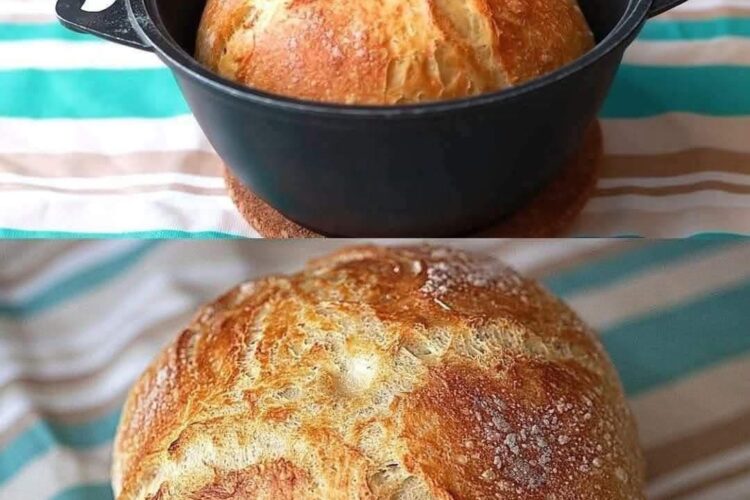
There’s something almost unforgettable about the smell of traditional homemade bread baking in the oven. It doesn’t just fill a kitchen—it transforms it. The air feels warmer, the mood softer, and suddenly even an ordinary day feels a little more meaningful. That smell is comfort, nostalgia, and simplicity all wrapped into one loaf.
If you’ve ever believed homemade bread is complicated, time-consuming, or reserved for experienced bakers, this recipe is here to change that mindset. The truth is, traditional bread doesn’t need fancy techniques or long ingredient lists. It only needs a few basic staples, a bit of patience, and the willingness to let time do most of the work.
This is a beginner-friendly, no-fuss traditional homemade bread recipe that delivers a golden crust, soft interior, and that unmistakable bakery-style aroma—right from your own kitchen.
Why This Traditional Homemade Bread Works
What makes this recipe special is its simplicity. With just four basic ingredients, it relies on natural fermentation and proper technique rather than shortcuts or additives.
There’s no sugar for sweetness, no oil for richness, and no unnecessary fillers. Just flour, water, yeast, and salt—the foundation of bread-making for centuries.
The result is a loaf that is:
- Crisp and golden on the outside
- Soft and airy on the inside
- Lightly wheaty and deeply comforting in flavor
- Perfect for sandwiches, toast, or simply enjoying warm with butter
Once you make it once, you’ll understand why people have been baking bread this way for generations.
Ingredients You’ll Need
This recipe keeps things extremely simple. You likely already have everything in your kitchen.
- 1.5 cups warm water (about 110°F / 43°C, warm but not hot)
- 1 tablespoon active dry yeast
- 4 cups (500g) all-purpose flour
- 1 teaspoon salt
That’s it. Four ingredients, one bowl, and one incredible loaf.
Step 1: Activating the Yeast
Begin by pouring the warm water into a large mixing bowl. The temperature matters here—too hot and it will kill the yeast, too cold and it won’t activate properly. Think of comfortable bathwater warmth.
Sprinkle the yeast over the surface of the water and gently stir it. Let the mixture sit for about 5 to 10 minutes.
During this time, the yeast should begin to foam and bubble. This is a sign that it is alive and active, ready to help your bread rise. If nothing happens, your yeast may be expired, and it’s best to start again with fresh yeast.
This small step is often called “waking up the yeast,” and it sets the foundation for everything that follows.
While you wait, you might notice how quickly the kitchen already starts to feel like something special is happening.
Step 2: Mixing the Dough
Once your yeast mixture is foamy, add the salt and begin incorporating the flour gradually—about one cup at a time.
Stir using a wooden spoon or your hands until a shaggy dough begins to form. At first, it may look rough, uneven, and slightly messy. That’s completely normal.
As you continue mixing, the dough will begin to come together into a cohesive mass. It should feel soft and slightly sticky but still manageable. If it feels too wet, sprinkle in a small amount of flour. If it feels too dry, add a tiny splash of water.
One of the most reassuring things about bread dough is how forgiving it is. It responds to you. It teaches you as you go.
Step 3: Kneading the Dough
Lightly flour a clean surface and turn your dough out onto it. Now comes the hands-on part: kneading.
Push the dough forward with the heel of your hand, fold it back over itself, rotate it slightly, and repeat. Continue this motion for about 8 to 10 minutes.
At first, the dough may feel sticky and uneven, but as you knead, it will transform. The texture becomes smoother, more elastic, and more structured.
You’ll know you’re done when:
- The dough feels soft and springy
- It bounces back slightly when pressed
- It no longer sticks heavily to your hands
This step is not just functional—it’s therapeutic. Many people find kneading calming, almost meditative. It slows you down and connects you directly to the process of making food from scratch.
Step 4: First Rise (Letting the Dough Rest)
Place your kneaded dough into a lightly oiled bowl. Turn it once so the surface is coated, preventing it from drying out. Cover the bowl with a clean kitchen towel or plastic wrap.
Set it in a warm, draft-free place and allow it to rise for about 1 to 1.5 hours, or until it has doubled in size.
This is where patience becomes your most important ingredient.
During this resting period, the yeast works quietly, producing air pockets that will give your bread its soft, fluffy texture. There’s nothing for you to do except wait—and that’s part of the magic.
It’s also the perfect time to relax, tidy up, or simply enjoy the anticipation of fresh bread.
Step 5: Shaping the Loaf
Once the dough has doubled in size, gently press it down with your hands to release excess air. This is often called “punching down the dough,” though it should be done softly rather than aggressively.
Transfer the dough onto a lightly floured surface and shape it into a loaf. You can form a classic oval shape or tuck it into a greased loaf pan for a more structured sandwich-style bread.
Place the shaped dough onto parchment paper or into your pan, then cover it again. Allow it to rest for another 30 to 40 minutes.
This second rise helps the dough relax and expand further, improving both texture and structure.
Step 6: Baking to Golden Perfection
Preheat your oven to 375°F (190°C).
Once the dough has completed its second rise, place it in the oven and bake for 30 to 35 minutes.
As it bakes, the crust will slowly turn golden brown, and your kitchen will fill with that unmistakable fresh-bread aroma.
To check if it’s done, tap the bottom of the loaf gently. If it sounds hollow, it’s ready.
Remove it from the oven and let it cool on a wire rack for at least 15 to 20 minutes before slicing. This cooling time allows the inside to set properly.
Resisting the urge to cut it immediately is the hardest part—but it’s worth it.
What Makes This Bread So Special
This traditional homemade bread stands out because of its simplicity. There are no artificial flavors, no preservatives, and no complicated techniques.
Just honest ingredients coming together through time and heat.
The crust is lightly crisp, offering a gentle bite. The inside is soft, airy, and slightly chewy. The flavor is clean and comforting, with that classic homemade warmth you can’t find in store-bought bread.
It’s the kind of bread that works for everything—breakfast toast, sandwich base, dinner side, or simply warm with butter.
Common Mistakes and How to Avoid Them
Even simple bread can go wrong sometimes. Here are a few things to watch for:
Using water that is too hot can kill the yeast and prevent rising. Always keep it warm, not steaming.
Adding too much flour can make the bread dense and heavy. Add gradually and only as needed.
Skipping rise time will result in a flat, underdeveloped loaf. Patience is essential.
Slicing the bread too early can make the texture gummy. Always let it cool before cutting.
Even if mistakes happen, the bread is still edible—and usually still delicious.
Storing Your Homemade Bread
Once completely cooled, store your bread in a paper bag, bread box, or wrapped in a clean kitchen towel.
For longer storage, slice the loaf and freeze it. You can toast slices directly from the freezer whenever needed, making it perfect for busy mornings.
Final Thoughts
Traditional homemade bread is more than just a recipe. It’s a process that teaches patience, simplicity, and appreciation for real food.
It reminds us that good things don’t have to be complicated. Sometimes, the best results come from the simplest ingredients handled with care.
Whether this is your first loaf or your fiftieth, each time you bake it, you’re creating something meaningful—not just food, but an experience.
So slice it warm, add a bit of butter, and enjoy the moment. You made this.