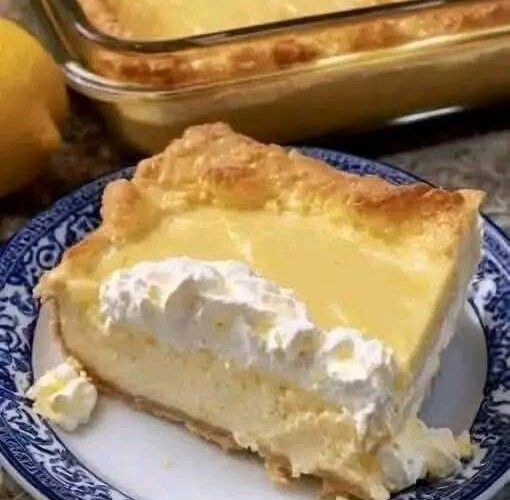
There’s something undeniably special about a homemade cheesecake. Rich, creamy, and perfectly balanced between sweet and tangy, it’s the kind of dessert that feels both luxurious and comforting at the same time. If you love classic cheesecake but want something a little easier to prepare and serve, these Creamy Baked Cheesecake Bars are exactly what you need.
Made with a buttery biscuit crust and a silky-smooth filling, this recipe delivers all the indulgence of a traditional cheesecake in a simple, sliceable form. Whether you’re preparing dessert for a family gathering, a casual get-together, or just treating yourself, these cheesecake bars are guaranteed to impress.
Let’s walk through everything you need to know to create this delicious dessert from scratch.
Why You’ll Love This Recipe
This cheesecake recipe stands out for several reasons:
Simple ingredients
You don’t need anything fancy—just pantry staples and a few fresh ingredients.
Beginner-friendly
Even if you’ve never made cheesecake before, this method is straightforward and forgiving.
Perfect texture
The result is a creamy, smooth filling with a slightly firm edge and a soft, melt-in-your-mouth center.
Easy to serve
Unlike round cheesecakes, these bars are baked in a rectangular pan and cut into neat squares, making them perfect for sharing.
Ingredients
For the Crust
- 200 g digestive biscuits (or graham crackers)
- 100 g melted butter
For the Cheesecake Filling
- 400 g cream cheese (softened)
- 200 ml heavy cream
- 120 g sugar
- 3 large eggs
- 1 tablespoon vanilla extract
- 2 tablespoons cornstarch
- 1 tablespoon lemon juice
- 200 ml milk
Equipment You’ll Need
To make this recipe smoothly, gather the following tools:
- Mixing bowls
- Electric mixer or whisk
- Food processor or rolling pin (for crushing biscuits)
- Square or rectangular baking pan
- Spatula
- Oven
Step-by-Step Instructions
Step 1: Prepare the Crust
Start by creating the base of your cheesecake.
Crush the digestive biscuits until they form fine crumbs. You can use a food processor for a quick result, or place them in a sealed bag and crush them with a rolling pin.
Transfer the crumbs to a bowl and pour in the melted butter. Mix thoroughly until all the crumbs are evenly coated and resemble wet sand.
Press this mixture firmly into the bottom of your baking pan. Make sure the layer is even and compact—this helps the crust hold together once baked.
Place the pan in the refrigerator for about 15 minutes. This step allows the butter to firm up, creating a stable base for the filling.
Step 2: Prepare the Cheesecake Filling
In a large mixing bowl, beat the softened cream cheese until it becomes smooth and creamy. This step is essential—any lumps at this stage can affect the final texture.
Add the sugar and continue mixing until fully combined.
Next, add the eggs one at a time, mixing well after each addition. This helps create a smooth and uniform batter.
Pour in the vanilla extract, lemon juice, milk, and heavy cream. Mix gently until everything is well incorporated.
Finally, add the cornstarch and mix until the batter becomes smooth, creamy, and slightly thickened. The cornstarch helps stabilize the cheesecake and gives it a perfect sliceable texture.
Step 3: Assemble and Bake
Remove the chilled crust from the refrigerator.
Pour the cheesecake filling over the crust, spreading it evenly with a spatula.
Preheat your oven to 160°C (320°F). A lower baking temperature helps prevent cracks and ensures even cooking.
Place the cheesecake in the oven and bake for 45 to 55 minutes. You’ll know it’s ready when:
- The top is lightly golden
- The edges are set
- The center still has a slight jiggle
Avoid overbaking, as this can lead to a dry texture.
Step 4: Cool Gradually
Once baked, turn off the oven and leave the cheesecake inside with the door slightly open for about 30 minutes.
This gradual cooling process helps prevent cracks and keeps the texture smooth.
After that, remove the cheesecake from the oven and allow it to cool completely at room temperature.
Step 5: Chill
Transfer the cooled cheesecake to the refrigerator and let it chill for at least 4 hours, or ideally overnight.
This step is crucial—it allows the cheesecake to fully set and develop its rich, creamy texture.
Serving Suggestions
Once fully chilled, remove the cheesecake from the pan and cut it into neat squares or bars.
For the best experience:
- Use a sharp knife and wipe it clean between cuts
- Serve the bars cold for maximum creaminess
You can enjoy these cheesecake bars as they are, or add toppings such as:
- Fresh berries
- Chocolate drizzle
- Caramel sauce
- Whipped cream
Tips for Perfect Cheesecake Bars
Use room temperature ingredients
This ensures a smooth batter and prevents lumps.
Don’t overmix the eggs
Mix just until combined to avoid incorporating too much air.
Bake at a low temperature
Gentle baking prevents cracking and keeps the texture creamy.
Be patient with chilling
Skipping or shortening the chill time will affect the texture and flavor.
Variations to Try
Once you’ve mastered the basic recipe, you can experiment with different flavors:
Chocolate Cheesecake Bars
Add melted chocolate to the filling for a rich twist.
Fruit Swirl Cheesecake
Swirl in strawberry or raspberry puree before baking.
Citrus Cheesecake
Add lemon or orange zest for a brighter flavor.
Cookie Crust Variation
Swap digestive biscuits for chocolate cookies or vanilla wafers.
Storage Instructions
These cheesecake bars store beautifully, making them perfect for preparing ahead of time.
Refrigerator:
Store in an airtight container for up to 4–5 days.
Freezer:
You can freeze the bars for up to 2 months. Wrap them individually and thaw in the refrigerator before serving.
Final Thoughts
This creamy baked cheesecake bar recipe is a perfect combination of simplicity and indulgence. With its buttery crust and smooth, rich filling, it’s a dessert that never fails to satisfy.
Whether you’re baking for a special occasion or just craving something sweet, these cheesecake bars are a reliable go-to. Once you try them, you’ll likely find yourself coming back to this recipe again and again—experimenting with flavors, toppings, and variations along the way.
Take your time, follow the steps, and enjoy the process. The result is well worth it: a perfectly creamy, sliceable cheesecake that looks beautiful and tastes even better.