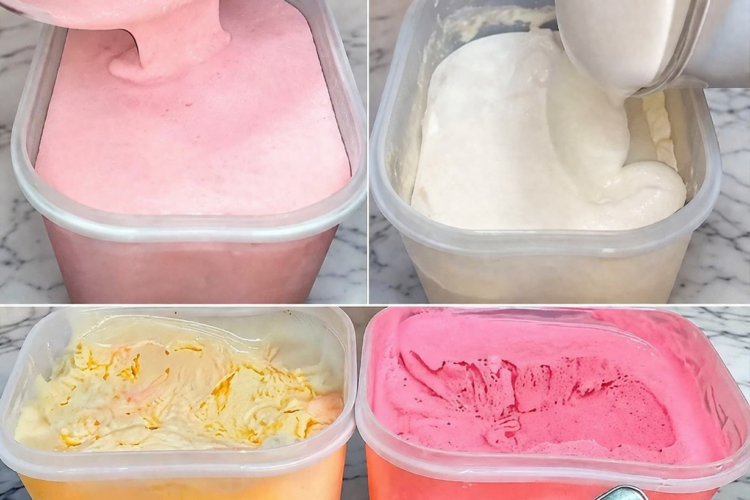
A creamy, dreamy frozen dessert made with just a few simple ingredients
Introduction
There is something undeniably magical about ice cream. It is a dessert that brings comfort, joy, and a sense of indulgence with every spoonful. But what if you could make a rich, velvety ice cream at home without needing an ice cream machine? That is exactly where no-churn ice cream comes in—a simple, foolproof method that transforms a handful of ingredients into a luxurious frozen treat.
No-churn ice cream has become increasingly popular for good reason. It eliminates the need for specialized equipment while still delivering a texture that rivals traditional churned ice cream. Instead of relying on constant churning to incorporate air and prevent ice crystals, this method uses a clever combination of whipped cream and sweetened condensed milk. The result is a soft, creamy consistency that feels indulgent and smooth on the palate.
This particular recipe takes things a step further by combining classic vanilla with a delicate strawberry swirl. The contrast between the creamy white base and the soft pink fruit layer creates a visually stunning dessert that tastes just as good as it looks. Whether you are preparing it for a summer gathering, a family dessert, or simply to satisfy a sweet craving, this recipe is both accessible and impressive.
Another reason to love this recipe is its flexibility. Even if you are new to baking or dessert-making, you can achieve excellent results by following a few simple steps. And once you master the base, you can easily adapt it with different flavors, mix-ins, and creative twists.
Nutritional Information (Per Serving – Approximate)
- Calories: 350
- Protein: 5 g
- Carbohydrates: 38 g
- Fat: 22 g
- Fiber: 0 g
- Sodium: 80 mg
Ingredients
- 2 cups (480 ml) heavy cream, very cold
- 1 can (14 oz / 397 g) sweetened condensed milk, chilled
- 1 teaspoon pure vanilla extract
- 1/2 cup (120 ml) strawberry puree (from 6–8 strawberries, fresh or frozen)
- Optional: a few drops of red or pink food coloring
Instructions
Begin by ensuring that all your ingredients are properly chilled. This is a crucial step that directly affects the texture of your ice cream. Cold cream whips more effectively and holds its structure better.
In a large mixing bowl, pour in the heavy cream. Using an electric mixer or a stand mixer fitted with a whisk attachment, beat the cream on medium-high speed. Continue whipping until stiff peaks form. This means that when you lift the whisk, the cream should stand upright without collapsing. Be careful not to overwhip, as this can cause the cream to become grainy.
In a separate bowl, combine the sweetened condensed milk and the vanilla extract. Stir gently until the mixture is smooth and well blended.
Next, take about one-third of the whipped cream and fold it into the condensed milk mixture. This step lightens the base and makes it easier to incorporate the remaining cream.
Add the rest of the whipped cream and fold gently using a spatula. Use slow, sweeping motions to preserve as much air as possible. This air is what gives the ice cream its light and creamy texture.
Once fully combined, divide the mixture evenly into two bowls. In one portion, gently fold in the strawberry puree. If you want a more vibrant pink color, add a few drops of food coloring at this stage.
Prepare a freezer-safe container such as a loaf pan or airtight box. Spoon alternating layers of the vanilla mixture and the strawberry mixture into the container.
Using a knife or skewer, gently swirl the two mixtures together to create a marbled effect. Avoid overmixing, as you want to maintain distinct swirls rather than blending everything into one color.
Cover the container tightly with a lid or plastic wrap and place it in the freezer. Allow the ice cream to freeze for at least six hours, although overnight freezing is recommended for the best texture.
Before serving, let the ice cream sit at room temperature for about 5 to 10 minutes. This will soften it slightly and make scooping easier. Serve and enjoy.
Tips for Perfect No-Churn Ice Cream
Achieving the perfect texture in no-churn ice cream depends on a few key techniques. First, always start with very cold cream. If the cream is not cold enough, it will not whip properly, and your ice cream may turn out dense or icy.
Folding is another essential step. When combining the whipped cream with the condensed milk, be gentle. Overmixing will deflate the air you worked so hard to incorporate, resulting in a heavier texture.
Using full-fat ingredients is also important. The richness of the cream and condensed milk contributes to the smooth, creamy consistency. Substituting low-fat versions may lead to a less satisfying result.
Finally, always store your ice cream in an airtight container. This prevents the formation of ice crystals and keeps the texture smooth for longer.
Flavor Variations
One of the best aspects of no-churn ice cream is how easy it is to customize. Once you have mastered the base, you can experiment with countless flavor combinations.
For a classic vanilla version, simply skip the strawberry puree and increase the vanilla extract slightly.
Chocolate lovers can melt chocolate and fold it into the base, or add cocoa powder for a rich, intense flavor.
Coffee ice cream is another delicious option. Dissolve instant espresso powder in a small amount of hot water, let it cool, and mix it into the condensed milk before combining with the whipped cream.
You can also incorporate mix-ins such as chocolate chips, crushed cookies, caramel swirls, or chopped nuts. Fresh fruits like raspberries, mangoes, or blueberries work beautifully as well.
The possibilities are endless, making this recipe a great starting point for creativity in the kitchen.
Storage Tips
Proper storage is essential to maintain the quality of your homemade ice cream. Once frozen, keep it in a tightly sealed container to prevent air exposure. This helps avoid freezer burn and the formation of ice crystals.
Homemade no-churn ice cream is best enjoyed within two to three weeks. While it will remain safe to eat beyond that time, the texture may become less creamy.
When serving, avoid leaving the container out for too long. Ice cream melts quickly, and repeated thawing and refreezing can negatively affect its consistency.
If you have leftovers, return them to the freezer promptly and ensure the container is sealed tightly.
Frequently Asked Questions
Why did my ice cream turn out icy?
This usually happens if the cream was not whipped enough or if the mixture was overmixed. Proper whipping and gentle folding are key to achieving a creamy texture.
Can I use low-fat ingredients?
It is not recommended. The fat content in heavy cream and condensed milk is essential for the smooth consistency of no-churn ice cream.
How long does it take to freeze?
The ice cream needs at least six hours to set, but freezing it overnight will give the best results.
Final Thoughts
Making ice cream at home does not have to be complicated. This no-churn strawberry vanilla ice cream proves that with just a few ingredients and simple steps, you can create a dessert that is both elegant and delicious.
It is a recipe that invites experimentation, encourages creativity, and rewards you with every creamy bite. Whether you enjoy it on a warm afternoon or serve it as a show-stopping dessert, this homemade treat is sure to impress.
Once you try it, you may never look at store-bought ice cream the same way again.