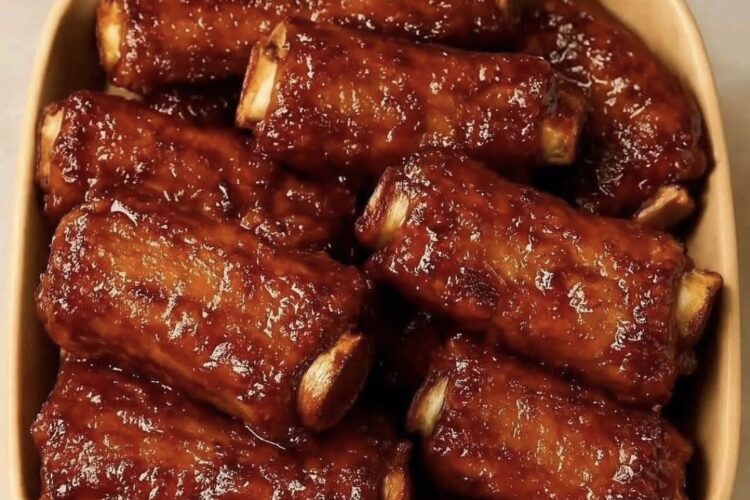
Fall-Off-the-Bone Tender with a Sweet & Savory Glaze
Introduction
There’s something deeply satisfying about a perfectly cooked rack of ribs—tender, juicy, and coated in a rich, sticky glaze that clings to every bite. This Sticky Honey Garlic Ribs recipe delivers exactly that experience, combining bold flavors with a melt-in-your-mouth texture that makes it unforgettable. Whether you’re preparing a cozy family dinner, hosting a backyard barbecue, or simply craving comfort food done right, these ribs are guaranteed to impress.
What truly sets this recipe apart is its beautiful balance of flavors. The natural sweetness of honey blends harmoniously with the sharp, aromatic punch of fresh garlic. Add to that the salty depth of soy sauce, a hint of tanginess from apple cider vinegar, and a subtle richness from brown sugar and ketchup, and you’ve got a glaze that’s complex yet incredibly approachable. For those who enjoy a bit of heat, a touch of sriracha adds a gentle kick that rounds everything out.
The cooking method is just as important as the ingredients. Slow cooking ensures the ribs become irresistibly tender, allowing the meat to pull away effortlessly from the bone. The finishing step—coating the ribs in a thickened, glossy glaze—creates that signature sticky texture that makes this dish so addictive. The result is ribs that are not only flavorful but also visually stunning, with a caramelized finish that glistens on the plate.
Even if you’ve never cooked ribs before, this recipe is designed to guide you step by step. With clear instructions and simple techniques, you’ll be able to achieve restaurant-quality results right in your own kitchen. By the end, you’ll have a dish that doesn’t just taste amazing but also feels like a true culinary accomplishment.
Nutritional Information (Per Serving – Approximate)
- Calories: 650
- Protein: 45g
- Carbohydrates: 40g
- Fat: 35g
- Fiber: 1g
- Sodium: 950mg
Ingredients
To create these delicious sticky honey garlic ribs, you’ll need the following:
- 2 racks (about 3–4 pounds total) pork baby back ribs or spare ribs
- 1 tablespoon olive oil
- Salt and freshly ground black pepper to taste
For the Honey Garlic Sauce:
- 1 cup honey
- 1/2 cup soy sauce (low sodium preferred)
- 1/4 cup apple cider vinegar
- 1/4 cup ketchup
- 2 tablespoons brown sugar (packed)
- 1 tablespoon Worcestershire sauce
- 1 tablespoon sriracha or other hot sauce (optional)
- 10 cloves garlic, minced
- 1 tablespoon fresh ginger, grated (optional but recommended)
For Thickening:
- 1 tablespoon cornstarch
- 2 tablespoons cold water
For Garnish:
- 2 tablespoons sesame seeds
- 2 green onions, thinly sliced
Preparation and Cooking Instructions
Step 1: Prepare the Ribs
Start by preheating your oven to 160°C (320°F). Remove the thin membrane from the back of the ribs—this step is essential for achieving tender meat. Pat the ribs dry with paper towels, then rub them with olive oil. Season generously with salt and freshly ground black pepper on both sides.
Place the ribs on a baking tray lined with foil, then cover tightly with another layer of foil. This helps trap moisture and ensures slow, even cooking.
Step 2: Slow Cook for Tenderness
Bake the ribs in the preheated oven for about 2.5 to 3 hours. During this time, the connective tissues will break down, resulting in soft, juicy meat. You’ll know they’re ready when the meat has shrunk slightly from the bones and feels tender when pierced with a fork.
Step 3: Prepare the Honey Garlic Sauce
While the ribs are cooking, it’s time to make the sauce. In a medium saucepan, combine the honey, soy sauce, apple cider vinegar, ketchup, brown sugar, Worcestershire sauce, sriracha (if using), minced garlic, and grated ginger.
Bring the mixture to a gentle simmer over medium heat, stirring occasionally. Allow it to cook for about 8–10 minutes so the flavors meld together beautifully.
Step 4: Thicken the Sauce
In a small bowl, mix the cornstarch with cold water to create a slurry. Slowly pour this into the simmering sauce while stirring continuously. Continue cooking for another 2–3 minutes until the sauce thickens into a glossy glaze.
Remove from heat and set aside.
Step 5: Glaze the Ribs
Once the ribs are fully cooked, remove them from the oven and carefully discard the top layer of foil. Increase the oven temperature to 220°C (425°F).
Brush a generous layer of the honey garlic sauce over the ribs, making sure every inch is coated.
Step 6: Caramelize to Perfection
Return the ribs to the oven, uncovered, and bake for an additional 10–15 minutes. This step allows the sauce to caramelize, creating that signature sticky, slightly crispy exterior.
For an extra glossy finish, you can brush on more sauce halfway through this step.
Step 7: Garnish and Serve
Remove the ribs from the oven and let them rest for a few minutes. Sprinkle with sesame seeds and sliced green onions for a fresh, vibrant touch.
Slice between the bones and serve immediately while warm.
Tips for the Best Results
- Remove the membrane: This small step makes a big difference in texture.
- Cook low and slow: Patience is key to achieving tender ribs.
- Don’t skip the glaze step: This is what gives the ribs their signature sticky finish.
- Adjust sweetness and spice: You can easily tweak the sauce to suit your taste preferences.
Serving Suggestions
These sticky honey garlic ribs pair wonderfully with a variety of side dishes. Consider serving them with:
- Steamed white or jasmine rice to soak up the extra sauce
- Coleslaw for a refreshing crunch
- Roasted vegetables for a balanced meal
- Crispy fries or potato wedges for a more indulgent option
Storage and Reheating
If you have leftovers, store them in an airtight container in the refrigerator for up to 3 days. To reheat, place the ribs in the oven at 160°C (320°F) until warmed through, brushing with extra sauce to maintain moisture.
Final Thoughts
Sticky Honey Garlic Ribs are more than just a meal—they’re an experience. From the moment the aroma begins to fill your kitchen to that first tender, flavorful bite, this dish delivers pure satisfaction. The combination of sweet, savory, and slightly tangy flavors creates a harmony that keeps you coming back for more.
Whether you’re cooking for loved ones or treating yourself, this recipe is one you’ll want to make again and again. With its simple steps and impressive results, it proves that great food doesn’t have to be complicated—just made with care and the right balance of flavors.