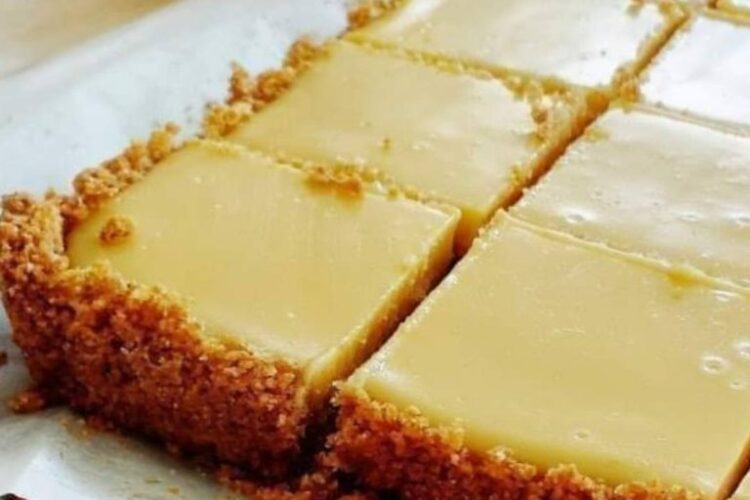
There’s something timeless about a simple lemon dessert. Bright, tangy, creamy, and sweet all at once, lemon bars have a way of bringing sunshine to the table no matter the season. Whether you’re making them for a family gathering, an afternoon coffee break, or just because you’re craving something citrusy and refreshing, these homemade lemon bars are the kind of dessert that always disappears fast.
What makes this recipe so special is its simplicity. With a buttery graham cracker crust and a silky lemon filling made from sweetened condensed milk and fresh lemon juice, these bars strike the perfect balance between rich and refreshing. Every bite melts in your mouth with a smooth citrus flavor that feels both comforting and elegant.
The best part? You don’t need fancy baking skills to make them. This recipe comes together with just a few ingredients and minimal prep time, making it perfect for beginner bakers and experienced dessert lovers alike.
If you’ve been searching for an easy lemon dessert that tastes bakery-quality without the effort, these lemon bars deserve a spot in your recipe collection.
Why You’ll Love These Lemon Bars
These creamy lemon squares are the ultimate combination of texture and flavor. Here’s why everyone falls in love with them:
- Simple ingredients you probably already have at home
- Bright citrus flavor from fresh lemon juice
- Creamy and smooth filling with the perfect sweet-tart balance
- Buttery graham cracker crust that adds crunch and richness
- Perfect for parties, holidays, picnics, or afternoon snacks
- Easy to prepare ahead of time
- Beautiful presentation with very little effort
Unlike traditional lemon bars that use flour-based shortbread crusts, this version uses graham cracker crumbs for an extra layer of sweetness and texture. The condensed milk creates a luscious filling that feels almost like a lemon cheesecake bar.
The Secret to Perfect Lemon Bars
The magic of these bars comes from the contrast between the crunchy crust and the velvety lemon filling. Fresh lemon juice is essential because it gives the filling its vibrant flavor and natural tartness.
Another key is allowing the bars to chill completely before slicing. This helps the filling firm up beautifully and gives you those clean bakery-style squares.
And don’t skip wiping the knife between cuts — it makes a huge difference in presentation.
Ingredients You’ll Need
For the Crust
- 4 tablespoons unsalted butter, melted and cooled
- 1½ cups graham cracker crumbs
- ¼ cup granulated sugar
For the Filling
- 2 large egg yolks
- 1 can (14 ounces) sweetened condensed milk
- ½ cup fresh lemon juice (about 3 lemons)
Kitchen Tools Needed
Before you begin, gather these simple kitchen tools:
- 8-inch square baking dish
- Parchment paper
- Mixing bowls
- Whisk
- Food processor or rolling pin
- Measuring cups
- Serrated knife
- Wire cooling rack
Having everything ready beforehand makes the baking process much smoother.
Step-by-Step Instructions
Step 1: Prepare the Baking Dish
Start by preheating your oven to 350°F (175°C).
Lightly butter an 8-inch square baking dish. Line the bottom with parchment paper, leaving a 2-inch overhang on the sides. This will make it much easier to lift the bars out later for clean slicing.
Step 2: Make the Graham Cracker Crust
Place the graham crackers into a food processor and pulse until you get fine crumbs. If you don’t have a food processor, you can crush them in a zip-top bag using a rolling pin.
Transfer the crumbs to a bowl and add the sugar and melted butter. Stir until the mixture resembles wet sand.
Press the mixture firmly into the bottom of the prepared baking dish and slightly up the sides. Use the back of a measuring cup to create an even layer.
Bake the crust for 8 to 12 minutes, or until lightly golden and fragrant.
Remove from the oven and let it cool completely for about 30 minutes.
Step 3: Prepare the Lemon Filling
While the crust cools, make the filling.
In a large mixing bowl, whisk together the egg yolks and sweetened condensed milk until smooth and creamy.
Slowly add the fresh lemon juice and continue whisking until fully combined. The mixture will begin to thicken slightly as the lemon juice reacts with the condensed milk.
Pour the filling over the cooled crust and spread it evenly to the edges.
Step 4: Bake the Lemon Bars
Place the dish back into the oven and bake for about 15 minutes, or until the filling is just set.
The center should no longer jiggle excessively when gently shaken.
Avoid overbaking, as the filling can lose its silky texture.
Step 5: Cool and Chill
Remove the bars from the oven and place the pan on a wire rack to cool completely.
Once cooled, transfer the pan to the refrigerator and chill for at least 1 hour. Chilling helps the filling firm up and makes slicing much easier.
Step 6: Slice and Serve
Using the parchment paper overhang, gently lift the lemon bars out of the pan and place them onto a cutting board.
With a serrated knife, cut into 16 squares. For the cleanest cuts, wipe the knife with a damp kitchen towel between slices.
Serve chilled and enjoy every creamy, citrusy bite.
Tips for the Best Lemon Bars
Use Fresh Lemon Juice
Freshly squeezed lemon juice gives the bars a vibrant flavor that bottled juice simply can’t match.
Chill Before Slicing
Cold bars hold their shape better and create cleaner edges.
Press the Crust Firmly
A tightly packed crust prevents crumbling and creates a sturdy base for the filling.
Don’t Overbake
The filling should still have a slight softness when removed from the oven. It will continue to set as it cools.
Delicious Variations
One of the best things about this recipe is how easy it is to customize.
Add Lemon Zest
For extra citrus flavor, mix a teaspoon of fresh lemon zest into the filling.
Make It Lime Bars
Swap the lemon juice for fresh lime juice for a tropical twist.
Add Coconut
Sprinkle toasted coconut flakes on top before serving for extra texture and flavor.
Dust with Powdered Sugar
A light dusting of powdered sugar gives the bars a beautiful bakery-style finish.
Berry Topping
Top each square with fresh raspberries or blueberries for a colorful presentation.
How to Store Lemon Bars
These lemon bars store beautifully, making them ideal for meal prep and parties.
Refrigerator
Store the bars in an airtight container in the refrigerator for up to 5 days.
Freezer
Freeze the bars in a single layer, then transfer them to a freezer-safe container. They can be frozen for up to 2 months.
Thaw overnight in the refrigerator before serving.
Perfect Occasions for Lemon Bars
These refreshing dessert squares are perfect for almost any occasion:
- Summer picnics
- Birthday parties
- Baby showers
- Easter brunch
- Afternoon tea
- Potlucks
- Holiday dessert trays
- Weekend baking projects
Their bright flavor and elegant appearance make them universally loved.
Frequently Asked Questions
Can I use bottled lemon juice?
Fresh lemon juice is highly recommended for the best flavor, but bottled lemon juice can work in a pinch.
Can I make these ahead of time?
Absolutely. In fact, they taste even better after chilling for several hours.
Why is my filling not setting?
This usually happens if the bars are underbaked or not chilled long enough.
Can I double the recipe?
Yes. Simply use a 9×13-inch baking dish and adjust the baking time slightly.
Final Thoughts
These easy homemade lemon bars are proof that simple desserts can be incredibly impressive. With their buttery graham cracker crust and smooth lemon filling, they deliver the perfect balance of sweet and tart in every bite.
Whether you’re serving them at a gathering or enjoying one straight from the fridge late at night, they have a way of making ordinary moments feel a little more special.
Once you try them, you’ll understand why lemon bars remain one of the most beloved classic desserts of all time.
So grab a few lemons, preheat your oven, and treat yourself to a batch of sunshine-filled homemade lemon bars.