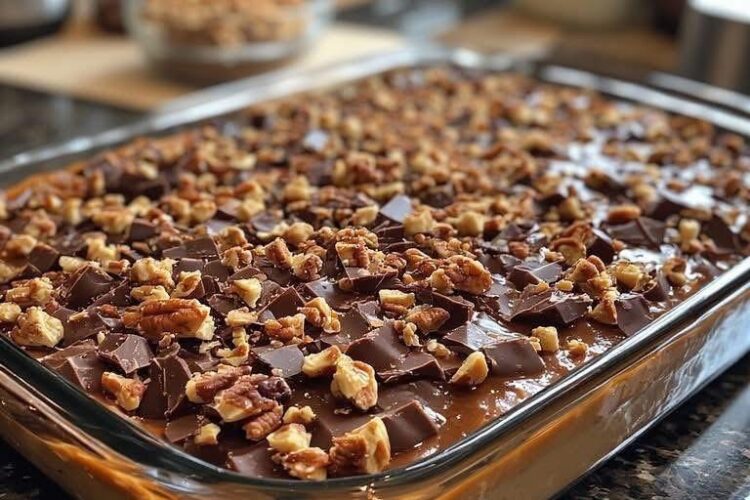
There’s something irresistible about desserts with layers. Not just layers of flavor—but layers of texture too. That magical combination of buttery, crunchy, chewy, creamy, and chocolatey creates the kind of dessert people remember long after the last bite disappears.
These Caramel Chocolate Crunch Bars are exactly that kind of dessert.
They start with a rich buttery graham cracker crust, followed by a smooth caramel layer that melts into crispy cereal for the perfect crunch, all finished with a glossy blanket of chocolate. Every bite gives you something different: soft caramel, crisp cereal, creamy chocolate, and a sturdy cookie base that holds it all together beautifully.
The best part? These bars look impressive but are surprisingly simple to make. No complicated baking skills, no specialty equipment, and minimal prep work. Whether you’re making them for holiday gatherings, bake sales, family movie nights, or simply because you’re craving something sweet, these bars deliver bakery-style results with very little effort.
If you love desserts that can be made ahead, stored easily, and sliced into perfect squares for serving, this recipe deserves a permanent place in your collection.
Why You’ll Love These Caramel Chocolate Crunch Bars
There are countless dessert bars out there, but these stand out because they combine multiple textures and flavors into one easy-to-make treat.
Incredible Texture Combination
Every layer serves a purpose:
- Buttery cookie crust for structure
- Smooth caramel for chewiness
- Crispy cereal for crunch
- Rich chocolate topping for balance
The contrast makes every bite exciting.
Easy to Make Ahead
These bars actually taste even better after chilling, making them perfect for preparing in advance.
No Fancy Equipment Needed
No stand mixer. No candy thermometer. No complicated steps. Just basic kitchen tools and simple ingredients.
Great for Sharing
These slice neatly into squares and transport well, making them ideal for parties, dessert trays, and gatherings.
Freezer Friendly
You can prepare a batch ahead and keep extras stored for future cravings.
Ingredients
For the Base Layer
- 1½ cups crushed graham crackers (or digestive biscuits)
- ½ cup melted butter
- ¼ cup brown sugar
For the Caramel Layer
- 1 cup soft caramel candies (or homemade caramel sauce)
- 2 tablespoons heavy cream
For the Crunch Layer
- 1½ cups crispy rice cereal
- ½ cup chopped roasted peanuts (optional)
For the Chocolate Topping
- 1½ cups semi-sweet chocolate chips
- 1 tablespoon coconut oil or butter
Kitchen Tools You’ll Need
Having everything ready beforehand makes the process smoother.
- 8×8-inch baking pan
- Parchment paper
- Mixing bowl
- Saucepan
- Rubber spatula
- Microwave-safe bowl
- Sharp knife
Step-by-Step Instructions
Step 1: Prepare the Pan
Preheat your oven to 350°F (175°C).
Line an 8×8-inch baking pan with parchment paper, leaving some overhang on the sides. This makes removing the bars much easier later.
Lightly grease the parchment if desired.
Step 2: Make the Graham Cracker Base
In a medium bowl, combine:
- Crushed graham crackers
- Melted butter
- Brown sugar
Mix until all crumbs are evenly coated and resemble wet sand.
Transfer the mixture into the prepared pan and press firmly into an even layer.
Bake for 8–10 minutes until lightly golden and fragrant.
Remove from the oven and allow it to cool slightly.
This short bake helps create a firmer crust that won’t crumble when sliced.
Step 3: Prepare the Caramel Layer
Place the caramel candies and heavy cream into a small saucepan.
Heat over low heat while stirring constantly.
Continue stirring until completely melted and smooth.
Avoid rushing this process by increasing the heat too much—slow melting prevents burning.
Once smooth, immediately pour the caramel over the cooled crust.
Spread evenly using a spatula.
Step 4: Add the Crunch Layer
While the caramel remains warm and sticky:
Sprinkle the crispy rice cereal evenly over the caramel.
If using roasted peanuts, scatter them across the surface as well.
Gently press the mixture into the caramel using clean hands or the back of a spoon.
Press lightly—you want everything to stick without crushing the cereal.
This layer creates the signature crunch that makes these bars so addictive.
Step 5: Melt the Chocolate
Combine chocolate chips and coconut oil in a microwave-safe bowl.
Microwave in 20-second intervals, stirring after each round.
Continue until fully melted and smooth.
Pour the melted chocolate over the crunchy layer.
Use a spatula to spread evenly into corners.
Tap the pan lightly on the counter to smooth out the surface.
Step 6: Chill Until Set
Place the pan in the refrigerator.
Chill for at least 1 hour.
The layers need time to firm up properly before slicing.
For extra clean cuts, chill a little longer.
Step 7: Slice and Serve
Lift the dessert from the pan using the parchment overhang.
Place onto a cutting board.
Using a sharp knife:
- Cut into squares
- Wipe the blade clean between cuts
- Slightly warm the knife for neater slices
Now enjoy those beautiful layers.
Tips for Perfect Caramel Chocolate Crunch Bars
Use Good Quality Chocolate
Higher-quality chocolate melts smoother and creates a more luxurious topping.
Don’t Skip the Chill Time
Rushing the chilling stage makes slicing difficult and messy.
Press the Base Firmly
A compact crust prevents crumbling.
Warm the Knife
Run your knife under hot water and dry it before slicing.
This creates professional-looking edges.
Easy Variations
One of the best things about this recipe is how customizable it is.
Salted Caramel Version
Sprinkle flaky sea salt over the chocolate before chilling.
The sweet-and-salty contrast is incredible.
Pretzel Crunch Bars
Replace part of the cereal with crushed pretzels.
Adds extra crunch and salty flavor.
Peanut Butter Twist
Mix peanut butter into the melted chocolate.
Dark Chocolate Lovers Version
Swap semi-sweet chips for dark chocolate.
Nut-Free Option
Skip the peanuts entirely.
Still delicious.
Storage Instructions
These bars store exceptionally well.
Refrigerator
Store in an airtight container for up to 1 week.
Place parchment between layers.
Freezer
Freeze for up to 3 months.
Wrap tightly to prevent freezer burn.
Allow bars to thaw slightly before serving.
Serving Ideas
These bars work for nearly every occasion.
Perfect for:
- Holiday dessert platters
- School bake sales
- Birthday parties
- Family gatherings
- Potlucks
- Afternoon coffee breaks
- Late-night dessert cravings
Serve chilled for firmer texture or let sit a few minutes at room temperature for softer caramel.
Frequently Asked Questions
Can I Use Homemade Caramel?
Absolutely.
Homemade caramel gives richer flavor and works beautifully.
Can I Double the Recipe?
Yes.
Use a 9×13-inch pan and double all ingredients.
Can I Make Them Without Baking?
You can skip baking the crust, but baking creates a sturdier base.
Why Are My Bars Falling Apart?
Usually this happens when:
- The crust wasn’t pressed firmly enough
- They weren’t chilled long enough
- The caramel layer was too thin
Final Thoughts
These Caramel Chocolate Crunch Bars prove that simple ingredients can create something truly special. Their combination of buttery crust, gooey caramel, crunchy cereal, and smooth chocolate creates an unforgettable dessert that feels far more complicated than it actually is.
Whether you’re making them for guests or simply keeping a batch in the fridge for sweet cravings, one thing is almost guaranteed:
They disappear fast.
So grab your ingredients, make a batch, and enjoy every crunchy, chocolate-covered bite.