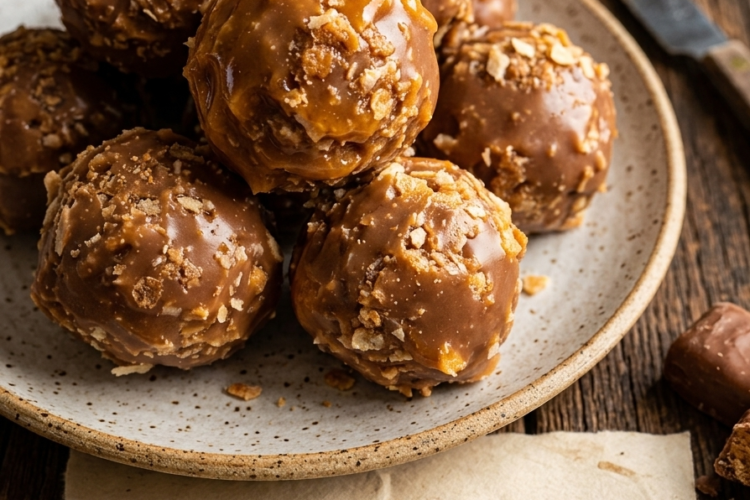
Butterfinger Balls are one of the easiest and most irresistible no-bake desserts you can make at home. They combine creamy peanut butter, crunchy Butterfinger candy pieces, and a smooth chocolate coating that hardens into a glossy shell. The result is a bite-sized treat that tastes like something from a professional candy shop, yet requires almost no effort.
What makes this recipe so appealing is its simplicity. There is no baking involved, no complicated steps, and no special equipment needed. In less than an hour, you can prepare a full batch of rich, sweet, crunchy candy balls that are perfect for sharing, gifting, or keeping in the fridge for whenever cravings hit.
These treats are especially popular for holidays, parties, and dessert trays because they look elegant and taste indulgent. They also store well, which makes them ideal for make-ahead desserts.
What Are Butterfinger Balls?
Butterfinger Balls are a type of no-bake dessert made by combining peanut butter, powdered sugar, vanilla extract, and crushed Butterfinger candy bars. The mixture is rolled into small balls, chilled until firm, and then coated in melted chocolate.
Each bite delivers multiple layers of texture and flavor. The inside is soft and creamy from the peanut butter base, while the Butterfinger pieces add a distinctive crunchy texture. The chocolate coating provides a smooth, slightly crisp shell that holds everything together.
They are similar to chocolate truffles but with a fun candy-bar twist that makes them more playful and crunchy. This combination is what makes them so addictive and crowd-pleasing.
Ingredients for Butterfinger Balls
To make this recipe, you only need a few simple ingredients that are easy to find in any grocery store.
You will need:
1 cup creamy peanut butter
1 1/2 cups crushed Butterfinger candy bars (about 4 standard bars)
1 cup powdered sugar
1 teaspoon vanilla extract
1/2 teaspoon salt
1 1/2 cups semi-sweet chocolate chips
1 tablespoon coconut oil or vegetable shortening
Each ingredient has an important role. The peanut butter forms the base and gives creaminess, while powdered sugar helps create structure so the mixture can be rolled. Vanilla adds depth of flavor, and salt balances the sweetness. The Butterfinger pieces bring crunch and caramelized flavor, and the chocolate coating finishes everything with richness and shine.
Step-by-Step Instructions
Step 1: Make the Peanut Butter Mixture
Start by adding creamy peanut butter to a large mixing bowl. Add powdered sugar, vanilla extract, and salt. Mix thoroughly using a spoon or spatula until everything begins to combine into a thick dough.
At first, the mixture may look crumbly or slightly dry, but keep mixing until it becomes smooth and uniform. This step is important because it ensures the balls will hold their shape later.
Once the base mixture is well combined, fold in the crushed Butterfinger pieces. Stir until the candy is evenly distributed throughout. You want every bite to contain a good balance of creamy peanut butter and crunchy candy bits.
Step 2: Shape the Balls
Prepare a baking sheet by lining it with parchment paper to prevent sticking.
Using a small spoon or cookie scoop, take about one tablespoon of the mixture and roll it between your hands to form a smooth ball. Try to keep the size consistent so they chill evenly and look uniform once finished.
Place each ball onto the prepared baking sheet, leaving a small space between them. The mixture will be soft at this stage, which is completely normal.
Step 3: Chill the Balls
Place the tray in the refrigerator for at least 30 minutes. This chilling step is essential because it firms up the peanut butter mixture, making it much easier to coat in chocolate later.
If you are short on time, you can place them in the freezer for 15 to 20 minutes instead, but refrigeration gives the best texture and prevents cracking when dipping.
Step 4: Melt the Chocolate
In a microwave-safe bowl, combine the semi-sweet chocolate chips with coconut oil.
Heat in 30-second intervals, stirring after each interval until the chocolate is fully melted and smooth. Be careful not to overheat, as chocolate can burn easily.
The coconut oil helps thin the chocolate slightly, making it easier to coat the balls evenly and giving them a shiny finish once set. If you don’t have coconut oil, vegetable shortening or a small amount of butter can be used instead.
Step 5: Coat the Balls in Chocolate
Remove the chilled peanut butter balls from the refrigerator.
Using a fork or dipping tool, carefully dip each ball into the melted chocolate. Roll it gently to ensure it is fully coated, then lift it out and allow any excess chocolate to drip off.
Place the coated ball back onto the parchment-lined tray. Repeat this process until all the balls are covered in chocolate.
Work fairly quickly, as the cold centers will help the chocolate set faster.
Step 6: Let the Chocolate Set
Once all the balls are coated, place the tray back into the refrigerator for about 15 minutes, or until the chocolate is completely firm.
After chilling, the Butterfinger Balls will have a smooth, glossy chocolate shell with a soft and creamy center filled with crunchy candy pieces.
Tips for the Best Butterfinger Balls
If the mixture feels too soft to roll, add a little extra powdered sugar until it firms up. If it feels too dry, add a small spoonful of peanut butter.
For best results, make sure the Butterfinger pieces are crushed into small but slightly uneven bits. This creates a better crunch and texture in every bite.
Always chill the balls before dipping. This prevents them from falling apart in the warm chocolate.
Using a fork for dipping helps remove excess chocolate and keeps the coating smooth and even.
Flavor Variations
This recipe is very flexible and can be customized in many ways.
You can replace Butterfinger with other candy bars such as Snickers, Twix, or Kit Kat for different flavors and textures.
For a sweet and salty twist, add crushed pretzels to the mixture.
If you prefer a nuttier flavor, try using almond butter instead of peanut butter.
You can also drizzle white chocolate over the top after coating for a decorative finish, or roll the finished balls in crushed nuts or cocoa powder instead of fully dipping them.
Each variation keeps the same simple base but creates a completely different flavor experience.
Storage and Make-Ahead Instructions
Butterfinger Balls store very well, making them ideal for preparing in advance.
In the refrigerator, they will stay fresh for up to one week when stored in an airtight container. If stacking them, place parchment paper between layers to prevent sticking.
In the freezer, they can be stored for up to two months. When ready to eat, simply let them sit at room temperature for about 10 to 15 minutes to soften slightly.
Because they hold their shape so well, they are perfect for holiday dessert trays, parties, or edible gift boxes.
Serving Suggestions
Butterfinger Balls can be served in many fun and creative ways. They look beautiful arranged on dessert platters alongside cookies, brownies, or other bite-sized sweets.
They also pair well with coffee, tea, or hot chocolate, making them a great after-dinner treat.
For gifting, place them in small decorative boxes or bags tied with ribbon. Their professional appearance makes them an excellent homemade gift for holidays or special occasions.
Frequently Asked Questions
Can I use crunchy peanut butter instead of creamy?
Yes, crunchy peanut butter works well and adds extra texture to the filling.
Do Butterfinger Balls need to be refrigerated?
Yes, they should be stored in the refrigerator to maintain their shape and freshness.
Can I freeze them?
Yes, they freeze very well for up to two months in an airtight container.
What can I use instead of coconut oil?
Vegetable shortening or a small amount of butter can be used to help smooth the melted chocolate.
Can I make them ahead of time?
Yes, they are perfect for making a day or two in advance or even freezing for later use.
Conclusion
Butterfinger Balls are a simple yet incredibly delicious no-bake dessert that delivers big flavor with minimal effort. The combination of creamy peanut butter, crunchy candy pieces, and rich chocolate coating makes them a guaranteed crowd-pleaser.
They are quick to prepare, easy to customize, and perfect for almost any occasion, from holiday celebrations to everyday sweet cravings. Once you try them, they are likely to become a regular favorite in your dessert rotation.