Introduction
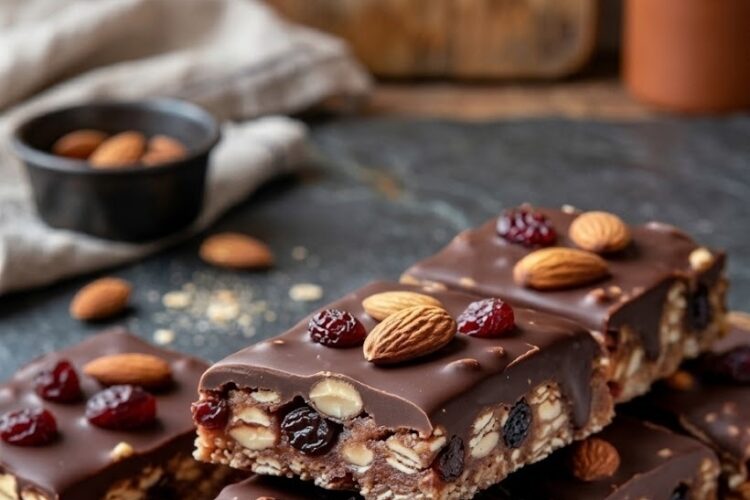
If you’re looking for a snack that strikes the perfect balance between indulgence and nourishment, these No-Bake Chocolate Oat Bars are exactly what you need. They are chewy, slightly crunchy, naturally sweetened, and layered with rich chocolate flavor in every bite. Best of all, they require no oven, no complicated techniques, and only a handful of simple pantry ingredients.
These bars are ideal for busy weekdays, school lunchboxes, post-workout energy, or late-night cravings when you want something sweet but still wholesome. The combination of oats, nuts, nut butter, and honey creates a satisfying base, while the dark chocolate topping adds a smooth, decadent finish that feels like a treat from a bakery.
What makes this recipe truly special is its versatility. You can customize it endlessly based on what you have at home—swap nuts, change dried fruits, or adjust sweetness levels. Once you try them, they will quickly become a staple in your kitchen.
Why You’ll Love These Chocolate Oat Bars
These bars are more than just a sweet snack. They are designed to be both nourishing and satisfying.
- No baking required, making them quick and easy
- Made with simple, wholesome ingredients
- Naturally sweetened with honey or maple syrup
- Packed with fiber, healthy fats, and energy
- Perfect for meal prep and grab-and-go snacking
- Customizable with endless variations
Whether you’re preparing snacks for the week or looking for a healthier dessert option, this recipe delivers both taste and convenience.
Ingredients You’ll Need
For the Oat Base
The foundation of these bars is a hearty, chewy mixture made from nutritious pantry staples.
- 1 cup rolled oats
- ½ cup almonds, roughly chopped
- ¼ cup peanuts or cashews (optional, for extra crunch)
- ⅓ cup raisins or dried cranberries
- ½ cup peanut butter or almond butter
- ⅓ cup honey or maple syrup
- ½ cup dark chocolate chips
- 1 teaspoon vanilla extract
- A pinch of salt
Each ingredient plays an important role. The oats provide structure and fiber, the nuts add crunch and healthy fats, the dried fruit gives natural sweetness, and the nut butter acts as a rich binding base.
For the Chocolate Topping
This layer is what transforms the bars from simple to irresistible.
- ¾ cup dark chocolate chips
- 1 tablespoon coconut oil or butter
The coconut oil helps create a smooth, glossy finish and makes the chocolate easier to slice once chilled.
Step-by-Step Instructions
Step 1: Prepare the Dry Base
Start by choosing a large mixing bowl. Add the rolled oats, chopped almonds, peanuts or cashews (if using), and dried fruit. Mix everything together until evenly combined. This dry mixture forms the structure of your bars, so make sure the ingredients are well distributed. Every bite should have a balance of crunch and sweetness.
Step 2: Create the Warm Binding Mixture
In a small saucepan over low heat, combine the peanut butter and honey (or maple syrup). Stir gently as the mixture warms until smooth and pourable. Remove from heat and stir in vanilla extract and a pinch of salt. The salt enhances the sweetness and deepens the flavor. This warm mixture binds everything together and creates the chewy texture.
Step 3: Combine Everything Together
Pour the warm peanut butter mixture over the dry oat mixture. Mix thoroughly until everything is coated. The mixture will be thick and sticky. Fold in the dark chocolate chips so they melt slightly and create pockets of chocolate throughout the bars.
Step 4: Shape the Bars
Line a square pan with parchment paper. Transfer the mixture into the pan and press it down firmly using a spoon or your hands. Compacting it well is essential so the bars hold together after chilling. Smooth the surface evenly.
Step 5: Prepare the Chocolate Topping
Melt the dark chocolate chips with coconut oil using a microwave or double boiler. Stir until smooth and glossy. Pour the melted chocolate over the oat base.
Step 6: Spread and Smooth
Spread the chocolate evenly across the surface using a spatula. Add optional toppings like chopped nuts or dried fruit if desired.
Step 7: Chill Until Firm
Refrigerate for 1 to 2 hours until fully set. You can also freeze for 30–40 minutes if you’re in a hurry. This step allows the bars to firm up properly for clean slicing.
Step 8: Slice and Serve
Lift the set mixture from the pan and cut into squares or bars. Serve immediately or store for later.
Storage Tips
Store the bars in an airtight container in the refrigerator for up to one week. Keep them chilled to maintain texture. For longer storage, freeze them for up to two months and thaw for a few minutes before eating.
Variations and Customization Ideas
You can easily adjust this recipe to suit your taste.
- Nut-free version: use sunflower or pumpkin seeds instead of nuts
- Protein boost: add a scoop of protein powder
- Different sweeteners: swap honey with maple or date syrup
- Crunchier texture: add puffed rice or coconut flakes
- Double chocolate: mix cocoa powder into the base
Helpful Tips for Perfect Bars
Press the mixture firmly into the pan for best results. Don’t overheat the nut butter mixture. Always allow full chilling time before slicing. Use a sharp knife for clean edges.
Final Thoughts
These No-Bake Chocolate Oat Bars are a simple yet delicious way to enjoy a homemade snack that feels indulgent but is made with wholesome ingredients. They are chewy, chocolatey, and perfect for any time of day. Once you make them, they’ll quickly become a go-to recipe in your kitchen.