Introduction
Few things in life compare to the comforting aroma of homemade bread baking in the oven. That unmistakable scent drifting through the kitchen instantly creates feelings of warmth, nostalgia, and home. Whether it reminds you of family dinners, cozy weekends, or afternoons spent in grandma’s kitchen, freshly baked bread has a special way of bringing people together.
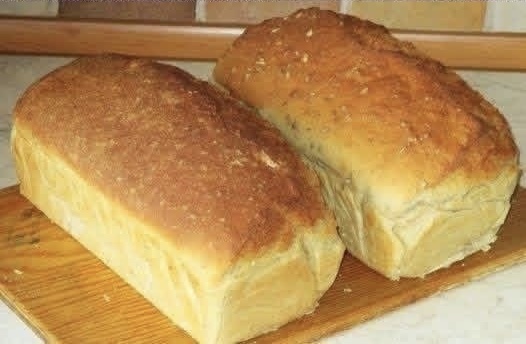
This Warm Butter Yeast Bread recipe delivers everything you could want from a classic homemade loaf: a beautifully golden crust, an incredibly soft and fluffy interior, and rich buttery flavor in every bite. Best of all, it’s simple enough for beginners while still producing bakery-quality results.
Homemade bread often feels intimidating at first. Many people worry about working with yeast, kneading dough correctly, or getting the perfect rise. The good news? This recipe removes the stress. With easy-to-follow steps and forgiving ingredients, you’ll discover that baking bread from scratch is not only achievable—it’s incredibly rewarding.
This bread is wonderfully versatile. Toast thick slices for breakfast, use it for sandwiches, serve it alongside soups and stews, or enjoy it warm from the oven with melted butter spread generously across each slice. Once you make this recipe, it may quickly become your go-to homemade bread.
Why You’ll Love This Recipe
There are countless bread recipes available, but this one stands out for several reasons:
- Soft, pillowy texture with a tender crumb
- Rich buttery flavor without being overly heavy
- Beginner-friendly instructions
- Perfect for sandwiches, toast, and dinner sides
- Freezes beautifully for later use
- Uses simple pantry ingredients
Every loaf comes out soft, flavorful, and comforting—exactly what homemade bread should be.
Nutritional Information
Approximate values per serving (1/12 loaf):
- Calories: 220 kcal
- Protein: 7g
- Carbohydrates: 38g
- Fat: 4g
- Fiber: 2g
- Sodium: 280mg
Ingredients
To make two beautiful loaves of Warm Butter Yeast Bread, gather the following ingredients:
- 2¼ teaspoons active dry yeast (1 packet)
- 1 cup warm water (105–115°F / 40–46°C)
- ½ cup warm milk
- ¼ cup granulated sugar
- 1 teaspoon salt
- ¼ cup unsalted butter, melted and slightly cooled
- 4½–5 cups all-purpose flour
- Extra butter for greasing pans
Kitchen Equipment Needed
Before beginning, prepare these tools:
- Large mixing bowl
- Measuring cups and spoons
- Wooden spoon or stand mixer
- Two 9×5-inch loaf pans
- Clean kitchen towels
- Wire cooling rack
- Instant-read thermometer (optional but helpful)
Step-by-Step Instructions
Step 1: Activate the Yeast
In a large bowl, combine warm water, warm milk, and sugar. Sprinkle yeast evenly over the surface.
Allow the mixture to sit for 5–10 minutes. The yeast should become foamy and bubbly.
If no foam appears, your yeast may be expired or your liquids were too hot or cold. Start again with fresh yeast for best results.
Step 2: Add Butter and Salt
Add melted butter and salt to the activated yeast mixture.
Stir thoroughly until fully combined. This buttery mixture forms the flavorful foundation of the bread.
Step 3: Begin Adding Flour
Add flour gradually, one cup at a time.
Mix thoroughly after each addition. The dough will slowly transition from wet batter to shaggy dough.
After adding around three cups, the dough should begin pulling together.
Step 4: Knead the Dough
Continue adding flour until the dough forms a soft, slightly sticky ball.
Transfer dough onto a lightly floured surface.
Knead for:
- 8–10 minutes by hand
- 6–8 minutes using a stand mixer
Properly kneaded dough should feel:
- Smooth
- Elastic
- Soft
- Slightly tacky but not sticky
Windowpane Test
Take a small piece of dough and stretch it gently.
If it stretches thin enough for light to pass through without tearing, your dough is ready.
Step 5: First Rise
Place dough into a lightly greased bowl.
Turn once to coat.
Cover with plastic wrap or a towel.
Place in a warm area and allow to rise for 1–1½ hours.
The dough should double in size.
Step 6: Prepare Your Pans
Grease two loaf pans generously.
Proper greasing ensures easy removal after baking.
Step 7: Punch Down Dough
After rising, gently press down dough to release trapped air.
Transfer to a lightly floured surface.
Divide evenly into two portions.
Step 8: Shape the Loaves
Flatten each dough piece into a rectangle.
Fold sides inward.
Roll tightly into loaf shapes.
Pinch seams closed.
Place seam-side down into prepared pans.
Step 9: Second Rise
Cover pans loosely.
Allow loaves to rise again for 45–60 minutes.
The dough should rise roughly 1 inch above pan rims.
Preheat oven to 375°F (190°C).
Step 10: Bake
Bake for 30–40 minutes.
Bread is done when:
- Tops are golden brown
- Internal temperature reaches 200–210°F
- Bottom sounds hollow when tapped
If tops brown too quickly, loosely cover with foil.
Step 11: Cool Completely
Remove bread from pans immediately.
Transfer to cooling racks.
Cool at least 30–60 minutes before slicing.
This prevents gummy texture and improves flavor development.
Expert Bread Baking Tips
Use Proper Liquid Temperature
Yeast thrives between 105–115°F.
Too cold = slow rise.
Too hot = dead yeast.
Avoid Adding Too Much Flour
Over-flouring creates dense bread.
Add only until dough feels soft and workable.
Find a Warm Spot
Good rising locations include:
- Turned-off oven with light on
- Warm kitchen counter
- Sunny windowsill
Don’t Rush the Rise
Proper fermentation creates flavor and texture.
Patience produces better bread.
Delicious Variations
Herb Garlic Bread
Brush with garlic butter and sprinkle:
- Rosemary
- Thyme
- Italian seasoning
Cheesy Bread
Mix in:
- ½ cup cheddar cheese
- Parmesan cheese
Cinnamon Swirl Version
Spread:
- Melted butter
- Brown sugar
- Cinnamon
Roll tightly before shaping.
Whole Wheat Blend
Replace 1–2 cups flour with whole wheat.
Add slightly more liquid if needed.
Seeded Loaf
Top with:
- Sesame seeds
- Poppy seeds
- Flax seeds
Extra Soft Milk Bread
Replace water entirely with milk.
Creates an extra-rich crumb.
Storage Instructions
Room Temperature
Store tightly wrapped for:
2–3 days
Use:
- Bread box
- Airtight container
- Plastic wrap
Freezing Instructions
Wrap completely cooled bread in:
- Plastic wrap
- Foil
- Freezer bags
Freeze up to:
2–3 months
Slice before freezing for convenience.
Reheating Tips
Whole Loaf
Heat at:
350°F (175°C)
Warm for:
10–15 minutes
Individual Slices
Use:
- Toaster
- Toaster oven
- Skillet
Avoid microwaving when possible since it can create chewy texture.
Frequently Asked Questions
Why is butter important in this recipe?
Butter creates:
- Rich flavor
- Tender crumb
- Soft texture
- Golden crust
Why didn’t my bread rise?
Possible causes:
- Old yeast
- Incorrect liquid temperature
- Cold environment
Can I make this without a mixer?
Yes.
Hand kneading works perfectly.
Simply knead longer until smooth.
How do I know bread is fully baked?
Look for:
- Golden crust
- Hollow sound when tapped
- Internal temperature above 200°F
Final Thoughts
Making homemade bread is one of the most rewarding kitchen experiences. This Warm Butter Yeast Bread recipe combines simplicity with incredible flavor, producing soft, buttery loaves perfect for nearly every occasion.
Once you pull these golden loaves from the oven and slice into that warm, fluffy interior, you’ll understand why homemade bread remains a timeless comfort food.
Serve it warm, share it generously, and enjoy every buttery bite.