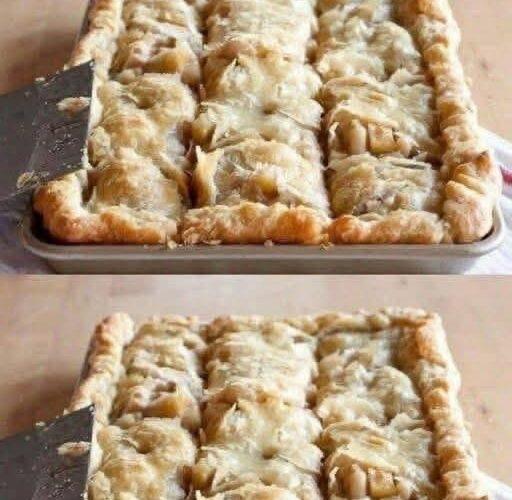
There’s something undeniably comforting about apple pie—the warm spices, the tender fruit, and that golden, flaky crust. But if you’ve ever found yourself negotiating over the last slice or wishing you had just a little more to share, it might be time to rethink the classic. Enter: Apple Slab Pie, the generously sized, easy-to-make dessert that delivers all the nostalgic flavor you love—without the limitations of a traditional round pie.
Perfect for gatherings, holidays, or even a cozy weekend baking session, this slab-style pie is baked in a rectangular pan, making it ideal for slicing into neat squares and serving a crowd. No more uneven wedges or struggling with delicate crusts—this recipe simplifies everything while amplifying the results.
Let’s dive into everything you need to know to make the perfect Apple Slab Pie from scratch.
Why Apple Slab Pie Is a Game-Changer
Traditional apple pie will always have a place at the table, but it does come with a few challenges. Typically, a standard pie yields about 6 to 8 slices, which isn’t always enough—especially during holidays or large gatherings. The round shape can also make slicing and serving a bit tricky, and transporting it without damaging the crust can be a challenge.
Apple Slab Pie solves all of these issues beautifully. Baked in a rectangular pan, it offers:
- More servings: Easily feeds 15 to 18 people
- Uniform slices: Perfect squares or rectangles every time
- Sturdier structure: Holds its shape better than traditional pies
- Simpler preparation: Easier to assemble and handle
- Better portability: Ideal for potlucks, bake sales, and parties
It’s everything you love about apple pie—just more practical and shareable.
Ingredients You’ll Need
This recipe makes one 13×9-inch slab pie, yielding approximately 15–18 servings.
For the Crust
- 2½ cups all-purpose flour
- 1 teaspoon salt
- 1 tablespoon granulated sugar
- 1 cup unsalted butter, cold and cubed
- 6–8 tablespoons ice water
Shortcut Tip: If you’re short on time, you can use two sheets of store-bought pie crust or even puff pastry for a quicker version.
For the Apple Filling
- 6–7 cups peeled and sliced apples (Granny Smith or Honeycrisp work best)
- ¾ cup granulated sugar
- 2 tablespoons brown sugar
- 2 tablespoons all-purpose flour
- 1 teaspoon ground cinnamon
- ¼ teaspoon ground nutmeg
- 1 tablespoon lemon juice
For the Topping
- 1 egg, beaten (for egg wash)
- 1 tablespoon coarse sugar (optional, for crunch and sparkle)
Step-by-Step Instructions
1. Prepare the Crust
If you’re making the crust from scratch, begin by combining the flour, salt, and sugar in a large mixing bowl. Add the cold, cubed butter and use a pastry cutter or your fingertips to work it into the flour until the mixture resembles coarse crumbs.
Gradually add ice water, one tablespoon at a time, mixing gently until the dough just comes together. Be careful not to overwork it.
Divide the dough into two equal portions, shape them into discs, and wrap them in plastic wrap. Chill in the refrigerator for at least 30 minutes.
Once chilled, roll out one portion into a rectangle slightly larger than your 13×9-inch baking pan. Carefully transfer it to the pan, pressing it gently into the bottom and sides. Place it back in the fridge while you prepare the filling.
2. Make the Apple Filling
In a large bowl, combine the sliced apples with granulated sugar, brown sugar, flour, cinnamon, nutmeg, and lemon juice. Toss everything together until the apples are evenly coated.
Let the mixture sit for about 5 to 10 minutes. This allows the apples to release their natural juices and helps the flavors meld together beautifully.
3. Assemble the Pie
Remove the prepared crust from the refrigerator and spread the apple filling evenly over it, making sure to distribute the slices uniformly.
Roll out the second portion of dough into another rectangle and gently place it over the top of the apples. Trim any excess dough and seal the edges by pressing them together with a fork or your fingers.
Cut a few small slits in the top crust to allow steam to escape during baking.
Brush the surface with the beaten egg to give it that beautiful golden finish, and sprinkle coarse sugar on top if desired.
4. Bake to Perfection
Preheat your oven to 375°F (190°C).
Place the pie in the oven and bake for 40 to 50 minutes, or until the crust is golden brown and the filling is bubbling through the slits.
If the edges begin to brown too quickly, you can cover them loosely with foil.
Once baked, remove the pie from the oven and allow it to cool for at least 30 minutes before slicing. This helps the filling set and makes cutting much easier.
When to Serve Apple Slab Pie
One of the best things about this dessert is its versatility. It fits seamlessly into almost any occasion:
- Holiday celebrations like Thanksgiving or Friendsgiving
- School bake sales and community events
- Family dinners and Sunday desserts
- Fall picnics or outdoor gatherings
- Casual coffee breaks with friends
Its easy-to-serve format and crowd-friendly size make it a reliable go-to recipe year-round.
Tips & Delicious Variations
Want to take your Apple Slab Pie to the next level? Try these simple ideas:
Add Crunch
Mix in a handful of chopped walnuts or pecans with the apple filling for extra texture and a nutty flavor.
Spice It Up
Enhance the warmth by adding a pinch of cardamom or allspice. These spices complement the apples beautifully and add depth.
Drizzle Something Sweet
Once cooled, drizzle the pie with vanilla icing or caramel sauce for an indulgent finish.
Try Different Fruits
Switch things up by using pears, peaches, plums, or even a mix of berries. This recipe is incredibly adaptable to the seasons.
Storage & Make-Ahead Tips
If you have leftovers (which isn’t always guaranteed!), store the pie tightly covered at room temperature for up to 2 days. For longer storage, keep it in the refrigerator for up to 5 days.
To freeze, slice the pie into individual portions, wrap each piece tightly, and store in the freezer for up to 3 months. When ready to enjoy, reheat in the oven to restore the crispness of the crust.
You can also prepare the dough ahead of time and refrigerate it for up to 2 days, making assembly even quicker when you’re ready to bake.
Final Thoughts
Apple Slab Pie is more than just a clever twist on a classic—it’s a practical, delicious solution for anyone who loves baking for a crowd. With its easy preparation, generous portions, and irresistible flavor, it’s bound to become a staple in your kitchen.
Whether you’re hosting a festive gathering or simply craving something warm and comforting, this recipe delivers every time. One bite in, and you’ll understand why this “bigger is better” version of apple pie is winning hearts everywhere.
So the next time you’re tempted to bake a traditional pie, consider going big—you might never go back.