Introduction
When it comes to healthy eating, finding recipes that are both simple and satisfying can sometimes feel like a challenge. That is where chia seed pudding truly stands out. Made with just a handful of wholesome ingredients, this dish transforms tiny chia seeds into a rich, creamy pudding without the need for cooking. It is one of the easiest and most versatile recipes you can prepare, whether you are looking for a quick breakfast, a light dessert, or a nutritious snack.
Chia seeds may be small, but they have a unique ability to absorb liquid and expand into a soft, gel-like texture. When mixed with milk and left to rest, they slowly thicken into a pudding that feels indulgent while still being incredibly healthy. The result is a smooth and comforting dish that can be customized in countless ways.
One of the biggest advantages of chia seed pudding is its convenience. You can prepare it in just a few minutes, place it in the refrigerator, and let time do the rest. By morning, you will have a ready-to-eat meal waiting for you. This makes it ideal for busy lifestyles, where time in the kitchen is limited but nutrition is still a priority.
Beyond its ease, chia seed pudding is loved for its flexibility. Whether you prefer natural fruit sweetness, a hint of spice, or a richer dessert-like flavor, you can easily adapt the recipe to suit your taste. With the addition of fresh fruits, nuts, or natural sweeteners, this simple base becomes a delicious and nourishing creation you will want to make again and again.
Why You Will Love This Recipe
Chia seed pudding is more than just a trendy health dish. It offers a balance of flavor, texture, and nutrition that makes it appealing to a wide range of people.
First, it is incredibly easy to prepare. There is no cooking involved, no complicated techniques, and no special equipment required. All you need is a bowl or jar, a spoon, and a few ingredients.
Second, it is highly nutritious. Chia seeds are naturally rich in fiber, healthy fats, and plant-based protein. When combined with milk and fresh toppings, this pudding becomes a well-rounded meal that can keep you feeling satisfied for hours.
Third, it is perfect for meal prep. You can make several servings at once and store them in the refrigerator for a few days. This makes it easier to maintain healthy eating habits, especially during busy weeks.
Finally, it is endlessly customizable. You can keep it simple or experiment with different flavors and textures depending on your mood and available ingredients.
Ingredients You Will Need
To prepare this creamy chia seed pudding, gather the following ingredients:
- 3 tablespoons chia seeds (about 36 grams)
- 1 cup milk (about 240 milliliters)
- 1 tablespoon honey (about 20 grams)
- 1/2 teaspoon vanilla extract (about 2 milliliters)
- 1/2 cup fresh berries (about 75 grams)
- 1/2 banana, sliced (about 60 grams)
- 1 tablespoon chopped almonds (about 10 grams)
- 1/4 teaspoon cinnamon powder
These ingredients create a balanced combination of creaminess, natural sweetness, and a touch of crunch.
Step-by-Step Method
Step 1: Prepare Your Container
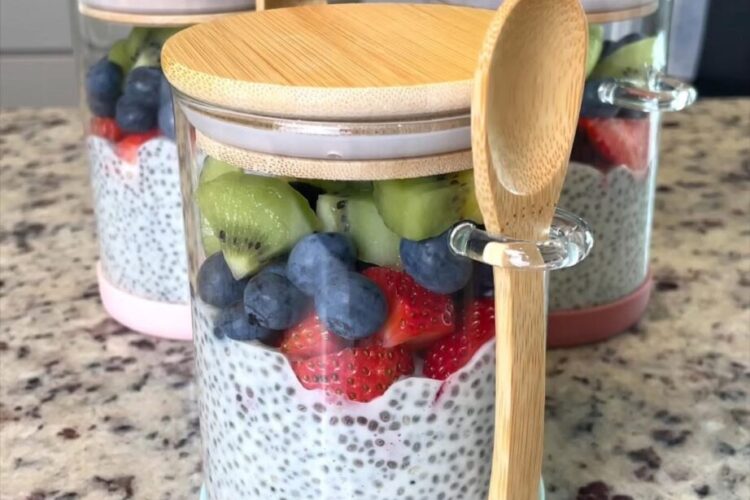
Start by selecting a medium-sized bowl or a glass jar. A jar with a lid is especially convenient because it allows you to mix and store the pudding in the same container. Make sure it is clean and completely dry before use.
Step 2: Add the Chia Seeds
Measure three tablespoons of chia seeds and add them to your bowl or jar. These tiny seeds are the key ingredient, responsible for creating the pudding’s thick and creamy texture.
Step 3: Pour in the Milk
Add one cup of milk to the chia seeds. You can use regular dairy milk for a richer flavor or choose plant-based options such as almond or coconut milk for a lighter variation.
Step 4: Add Flavor Ingredients
Stir in one tablespoon of honey for natural sweetness. Then add half a teaspoon of vanilla extract to enhance the flavor. Finish by sprinkling a small amount of cinnamon powder for warmth and depth.
Step 5: Mix Thoroughly
Using a spoon, stir the mixture well for about 30 seconds. It is important to ensure that the chia seeds are evenly distributed throughout the liquid to prevent clumping.
Step 6: Let It Rest
Cover the bowl or seal the jar with a lid and place it in the refrigerator. Allow it to rest for at least four hours, though overnight is ideal. During this time, the chia seeds will absorb the liquid and thicken into a pudding-like consistency.
Step 7: Stir Again
Once the pudding has set, remove it from the refrigerator and give it another good stir. This step helps improve the texture, making it smoother and more uniform.
Step 8: Add Toppings
Top your pudding with fresh berries, sliced banana, and chopped almonds. These toppings not only enhance the flavor but also add color, texture, and extra nutrients.
Step 9: Serve and Enjoy
Your chia seed pudding is now ready to enjoy. Serve it cold directly from the refrigerator for a refreshing and satisfying treat.
Nutrition and Protein Content
This recipe is not only delicious but also nutritionally balanced. Here is an approximate breakdown of its protein content:
- Chia seeds (3 tablespoons): about 6 grams of protein
- Milk (1 cup, dairy): about 8 grams of protein
- Almonds (1 tablespoon): about 2 grams of protein
- Banana (half): about 0.6 grams of protein
- Fresh berries (half cup): about 0.5 grams of protein
In total, the recipe provides approximately 17 grams of protein when made with dairy milk. This makes it a great option for those looking to increase their protein intake while enjoying a plant-forward meal.
Additionally, chia seeds are rich in fiber, which supports digestion and helps maintain a feeling of fullness. They also contain omega-3 fatty acids, which contribute to overall health.
What Makes This Recipe Special
Chia seed pudding stands out because of its simplicity and versatility. Unlike many other recipes, it does not require cooking, baking, or complicated preparation steps. This makes it ideal for beginners or anyone looking for a quick and reliable dish.
Another reason it is special is its adaptability. You can easily modify the ingredients to suit your taste preferences or dietary needs. Whether you prefer a sweeter version, a fruit-based variation, or even a chocolate twist, this recipe can be adjusted effortlessly.
It is also an excellent choice for meal preparation. By making multiple servings in advance, you can ensure that you always have a healthy option ready to go. This can help reduce the temptation to reach for less nutritious snacks.
Extra Tips for the Best Results
To make your chia seed pudding even better, consider these helpful tips:
- Use full-fat milk if you prefer a richer and creamier texture.
- Allow the pudding to rest overnight for the best consistency and flavor.
- Add a teaspoon of cocoa powder for a chocolate version.
- Mix in mashed banana before chilling for natural sweetness.
- Top with granola for added crunch.
- Choose fresh, seasonal fruits for the best taste and color.
- Stir the pudding before serving to maintain a smooth texture.
These small adjustments can make a big difference in both flavor and texture.
Flavor Variations to Try
Once you are comfortable with the basic recipe, you can experiment with different variations:
- Chocolate chia pudding with cocoa powder and a touch of honey
- Tropical version with mango and coconut milk
- Apple cinnamon pudding with grated apple and extra spice
- Berry blend with mixed fruits and a drizzle of maple syrup
Each variation offers a new way to enjoy this simple dish without getting bored.
Final Thoughts
Chia seed pudding is one of the easiest and most rewarding recipes you can add to your routine. With minimal preparation and no cooking required, it delivers a creamy, satisfying result that fits into any part of your day.
Whether you enjoy it as a quick breakfast, a midday snack, or a light dessert, this pudding offers both nourishment and comfort. Its combination of natural ingredients, customizable flavors, and nutritional benefits makes it a reliable choice for anyone looking to eat well without spending too much time in the kitchen.
Once you try it, there is a good chance it will become a regular part of your healthy eating habits.
Disclaimer
This article is intended for general informational and educational purposes only. Nutritional values may vary depending on the ingredients and quantities used. Individual dietary needs and responses to food can differ. This recipe is not intended to diagnose, treat, or cure any health condition. If you have specific dietary concerns or health conditions, consult a qualified health professional before making changes to your diet.