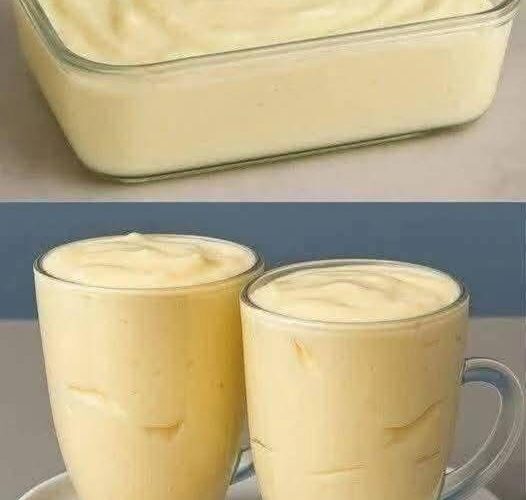
There are certain desserts that feel timeless—simple, comforting, and universally loved. Creamy vanilla custard pudding is one of those recipes. With its silky texture, delicate sweetness, and rich vanilla aroma, it has the power to turn even an ordinary day into something special. Whether served warm on a cozy evening or chilled on a hot afternoon, this dessert delivers pure satisfaction with every spoonful.
In this blog-style recipe, you’ll discover not only how to make the perfect vanilla custard pudding, but also tips, variations, and insights that will help you master this classic treat at home.
Why You’ll Love This Recipe
Vanilla custard pudding strikes the perfect balance between simplicity and indulgence. It requires only a handful of basic ingredients—most of which you probably already have in your kitchen—yet the result feels luxurious and elegant.
Here’s why this recipe stands out:
- It’s easy to prepare, even for beginners
- It uses simple pantry staples
- It delivers a smooth, creamy texture every time
- It can be customized in countless ways
- It’s perfect for both everyday desserts and special occasions
Once you try making it from scratch, it’s hard to go back to store-bought versions.
Ingredients You’ll Need
To create this delicious custard pudding, you’ll need the following ingredients:
- 2 cups (500 ml) whole milk
- ½ cup (100 g) sugar
- 3 tablespoons cornstarch
- 2 egg yolks
- 2 tablespoons butter
- 1 teaspoon vanilla extract
- A pinch of salt
Each ingredient plays an important role in achieving the perfect consistency and flavor.
Understanding the Ingredients
Before diving into the method, it’s helpful to understand why each ingredient matters:
Whole milk provides richness and creaminess. Using full-fat milk gives the pudding a luxurious texture.
Sugar adds sweetness and balances the richness of the custard.
Cornstarch acts as the thickening agent, helping the pudding achieve that smooth, spoonable consistency.
Egg yolks enhance both texture and flavor, adding depth and a velvety finish.
Butter contributes richness and a glossy finish.
Vanilla extract is the star flavor, giving the pudding its signature aroma.
Salt may seem minor, but it enhances all the other flavors.
Step-by-Step Instructions
1. Mix the Dry Ingredients
Start by placing a medium saucepan on your countertop. Add the sugar, cornstarch, and a pinch of salt. Whisk them together thoroughly to ensure even distribution.
This step is crucial because it prevents lumps from forming later when the liquid is added.
2. Gradually Add the Milk
Slowly pour the milk into the saucepan while whisking continuously. Adding the milk gradually helps dissolve the dry ingredients smoothly.
Take your time here—this is the foundation for a lump-free custard.
3. Cook the Mixture
Place the saucepan over medium heat. Stir constantly using a whisk or wooden spoon.
As the mixture heats up, it will begin to thicken. This process usually takes about 5 to 8 minutes.
You’ll know it’s ready when:
- The mixture coats the back of a spoon
- It has a smooth, pudding-like consistency
Be patient and keep stirring to prevent sticking or burning.
4. Temper the Egg Yolks
In a separate bowl, lightly beat the egg yolks.
To avoid scrambling the eggs, you need to temper them. This means slowly raising their temperature.
Add a few spoonfuls of the hot milk mixture into the yolks while whisking continuously. This gently warms the eggs without cooking them too quickly.
5. Combine and Cook Again
Pour the tempered egg mixture back into the saucepan.
Return the pan to medium heat and continue stirring constantly for another 2 to 3 minutes.
At this stage, the custard will become even thicker and creamier.
Make sure not to stop stirring, as the eggs can cook quickly.
6. Finish with Flavor
Remove the saucepan from the heat.
Immediately stir in the butter and vanilla extract. The butter will melt into the custard, giving it a rich, silky finish, while the vanilla adds its signature fragrance.
This step transforms the custard from simple to irresistible.
7. Cool and Set
Pour the custard into serving dishes, ramekins, or a large bowl.
Let it cool at room temperature for a short time, then transfer it to the refrigerator.
Chill for at least 2 hours, or until fully set.
Once cooled, the pudding will firm up slightly while maintaining its creamy texture.
Tips for Perfect Custard Every Time
Making custard is simple, but a few expert tips can elevate your results:
Stir constantly
This prevents lumps and ensures even cooking.
Use medium heat
High heat can cause the mixture to cook too quickly and curdle.
Don’t skip tempering
Adding eggs directly to hot liquid can result in scrambled eggs instead of smooth custard.
Strain if needed
If you notice any lumps, pass the custard through a fine sieve before chilling.
Cover to prevent skin
Place plastic wrap directly on the surface before refrigerating to avoid a skin forming.
Serving Suggestions
Vanilla custard pudding is delicious on its own, but you can also enhance it with toppings and pairings:
- Fresh fruits like berries, bananas, or mango slices
- A sprinkle of cinnamon or nutmeg
- Crushed biscuits or cookies for added texture
- A drizzle of caramel or chocolate sauce
- Whipped cream for extra indulgence
It can also be used as a filling for pastries, cakes, or layered desserts.
Variations to Try
Once you’ve mastered the basic recipe, you can experiment with flavors:
Chocolate Custard
Add melted chocolate or cocoa powder during cooking.
Coffee Custard
Mix in a teaspoon of instant coffee for a subtle coffee flavor.
Coconut Custard
Replace part of the milk with coconut milk for a tropical twist.
Citrus Custard
Add lemon or orange zest for a refreshing flavor.
Spiced Custard
Infuse the milk with cinnamon sticks or cardamom before cooking.
Storage and Shelf Life
Custard pudding can be stored in the refrigerator for up to 3 days.
Make sure it is covered היט to maintain freshness and prevent it from absorbing odors.
Avoid freezing, as it can alter the texture and make it watery when thawed.
Common Mistakes to Avoid
Even simple recipes can go wrong if you’re not careful. Here are a few pitfalls to watch for:
Overheating the custard
This can cause curdling or a grainy texture.
Not stirring enough
Leads to lumps and uneven consistency.
Skipping the straining step (if needed)
May result in a less smooth pudding.
Adding eggs too quickly
Always temper them first to maintain a creamy texture.
The Comfort of Homemade Desserts
There’s something deeply satisfying about making a dessert from scratch. Vanilla custard pudding is more than just a recipe—it’s a reminder that simple ingredients, when handled with care, can create something truly special.
The process itself is calming: whisking, stirring, watching the mixture transform. And the reward is a dessert that feels both nostalgic and comforting.
Final Thoughts
Creamy vanilla custard pudding is a dessert that never goes out of style. It’s easy enough for beginners, yet refined enough to impress guests. Whether you’re making it for your family, a gathering, or just yourself, it’s a recipe worth keeping.
Once you experience the rich, velvety texture and delicate vanilla flavor, it will likely become a regular in your kitchen.
So the next time you’re craving something sweet, skip the store-bought options and make this homemade custard instead. It’s simple, satisfying, and absolutely delicious.