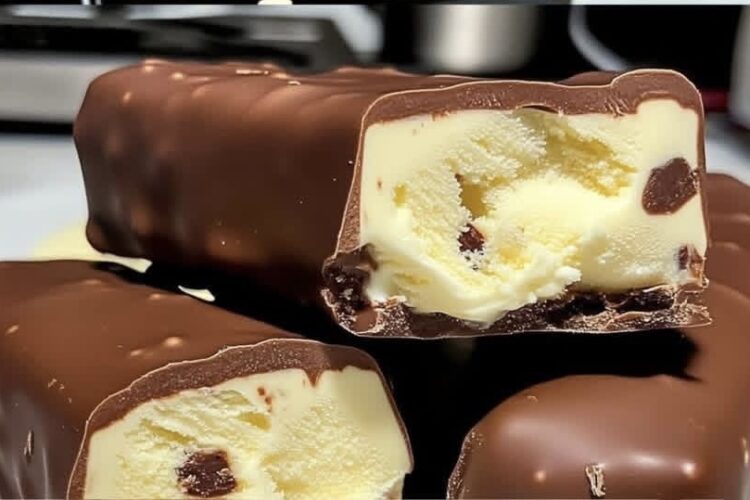
If you’ve ever wished for a frozen dessert that feels like something from an ice cream shop but costs far less and tastes even richer, these homemade popsicles with a chocolate shell are exactly what you need. They’re creamy, smooth, lightly sweet, and wrapped in a crisp chocolate coating that cracks beautifully with every bite.
What makes this recipe special is not just the flavor, but how simple it is to prepare at home. You don’t need professional equipment, cooking classes, or complicated techniques. With a few basic ingredients and a little patience while they freeze, you can create a dessert that feels luxurious but is surprisingly easy to make.
This recipe also gives you full control. You can adjust sweetness, change the chocolate type, or even experiment with flavors. Whether you’re making them for kids, guests, or just to stock your freezer with treats for yourself, these popsicles are a guaranteed win.
Why You’ll Love This Recipe
Homemade popsicles often get a bad reputation for being icy or bland, but this version is different. The combination of milk, egg yolks, pudding mix, and cream creates a rich, custard-like base that freezes into something incredibly smooth.
Here’s why this recipe stands out:
- The texture is creamy, not icy
- The chocolate shell adds a satisfying crunch
- Ingredients are simple and budget-friendly
- It can be customized in many ways
- No ice cream machine needed
- Perfect for summer or year-round desserts
Once you make these once, you’ll probably stop buying store-bought popsicles altogether.
Ingredients You’ll Need
This recipe is divided into two parts: the creamy popsicle base and the chocolate shell coating.
For the Popsicle Base
- 1 1/4 cups cold milk (300 ml)
- 4 egg yolks
- 1 tablespoon vanilla pudding mix
- Sweetened condensed milk (about 300 g, adjust to taste)
- 1 cup heavy cream or table cream (200 g)
For the Chocolate Shell
- 300 g milk chocolate or semi-sweet chocolate
You can also use dark chocolate if you prefer a slightly less sweet and more intense flavor.
Step-by-Step Instructions
Step 1: Prepare the Creamy Base
Start by pouring the milk into a saucepan. Add the egg yolks and vanilla pudding mix. Whisk everything together until smooth before turning on the heat.
Place the saucepan over low heat. This part is important because cooking too fast can scramble the eggs. Stir continuously and gently. As the mixture heats up, it will gradually begin to thicken.
You’ll notice the texture changing into a smooth custard-like consistency. Keep stirring until it starts to lightly bubble. Once it reaches that point, remove it from the heat immediately.
Let the mixture cool completely at room temperature. This step ensures the cream doesn’t separate later when blended.
Step 2: Blend for Smoothness
Once the mixture is fully cooled, transfer it into a blender. Add the heavy cream and sweetened condensed milk.
Blend everything until the mixture becomes completely smooth and creamy. This is what gives the popsicles their rich, ice cream-like texture.
Taste it at this stage if you want to adjust sweetness. You can add a little more condensed milk if you prefer a sweeter dessert, or keep it lighter if you like a more balanced flavor.
Step 3: Fill the Molds
Pour the mixture into popsicle molds or small disposable cups. If you’re using cups, cover them with foil and insert wooden sticks through the center to keep them upright.
Place the molds in the freezer. Freeze for at least 6–8 hours, or overnight for best results. The popsicles need to be completely solid before adding the chocolate coating.
Making the Chocolate Shell
The chocolate shell is what transforms these popsicles from simple frozen treats into something truly special. It hardens almost instantly when it touches the cold surface, creating a thin, crisp layer.
Step 4: Melt the Chocolate
Break the chocolate into small pieces and melt it using one of the following methods:
- Double boiler: Place chocolate in a heatproof bowl over simmering water
- Microwave: Heat in short 20–30 second intervals, stirring each time
Stir until the chocolate is completely smooth and glossy. Let it cool slightly before dipping, but do not let it harden.
Step 5: Dip the Popsicles
Remove the frozen popsicles from the molds. Work quickly so they don’t start melting.
Dip each popsicle into the melted chocolate. The cold temperature will immediately cause the chocolate to set into a thin shell.
Let any excess chocolate drip off before placing the popsicle on a baking tray lined with parchment paper.
If the chocolate is too thick or starts to harden too quickly, gently reheat it for a few seconds.
Step 6: Final Freeze
Once all popsicles are coated, return them to the freezer for another 20–30 minutes. This helps the chocolate shell fully harden and set properly.
After this step, your homemade chocolate-coated popsicles are ready to enjoy.
Helpful Tips for Perfect Popsicles
To make sure your results turn out perfect every time, keep these tips in mind:
- Always cool the custard base completely before blending
- Stir constantly when cooking to avoid scrambling the egg yolks
- Freeze long enough so popsicles are fully solid before dipping
- Use good-quality chocolate for a better shell texture and flavor
- If the chocolate is too thick, add a small amount of neutral oil to thin it slightly
These small details make a big difference in texture and taste.
Flavor Variations You Can Try
One of the best things about this recipe is how flexible it is. Once you master the base, you can easily create new flavors.
Here are some ideas:
1. Chocolate Popsicles
Add 2 tablespoons of cocoa powder to the base mixture before blending.
2. Strawberry Version
Blend in fresh or frozen strawberries for a fruity twist.
3. Coffee Cream Pops
Add 1 teaspoon of instant coffee dissolved in a little warm water.
4. Cookies and Cream
Crush chocolate cookies and mix them into the base before freezing.
5. Nutty Version
Add chopped hazelnuts or almonds for crunch inside the creamy base.
Each version gives you a completely different dessert experience.
Common Problems and How to Fix Them
Why are my popsicles icy?
This usually happens if the mixture is not creamy enough. Make sure you use enough cream and condensed milk.
Why is my chocolate not sticking?
The popsicles must be very cold. If they start melting, the chocolate will slide off.
Why did my custard curdle?
This happens when heat is too high. Always cook on low heat and stir constantly.
Storage Tips
Once finished, store the popsicles in an airtight container or freezer bag. You can keep them frozen for up to 2–3 weeks.
To prevent sticking, place parchment paper between layers if stacking them.
Serving Ideas
These popsicles are perfect on their own, but you can also serve them in creative ways:
- Drizzle with extra melted chocolate before serving
- Sprinkle crushed nuts or coconut flakes on top
- Serve with fresh fruit for a balanced dessert plate
- Pair with coffee or iced drinks for a refreshing snack
They also make great treats for parties, especially during warm weather.
Final Thoughts
Homemade popsicles with a chocolate shell are proof that simple ingredients can create something truly special. With a creamy custard base, a smooth blend of cream and condensed milk, and a crisp chocolate coating, every bite feels like a gourmet dessert.
The best part is how easy they are to prepare. Once you make them at home, you’ll realize you don’t need expensive store-bought desserts to enjoy something delicious and satisfying.
This recipe is flexible, beginner-friendly, and perfect for anyone who wants to bring a little creativity into their kitchen. Whether you stick to the classic version or try your own variations, these popsicles are sure to become a favorite in your freezer.