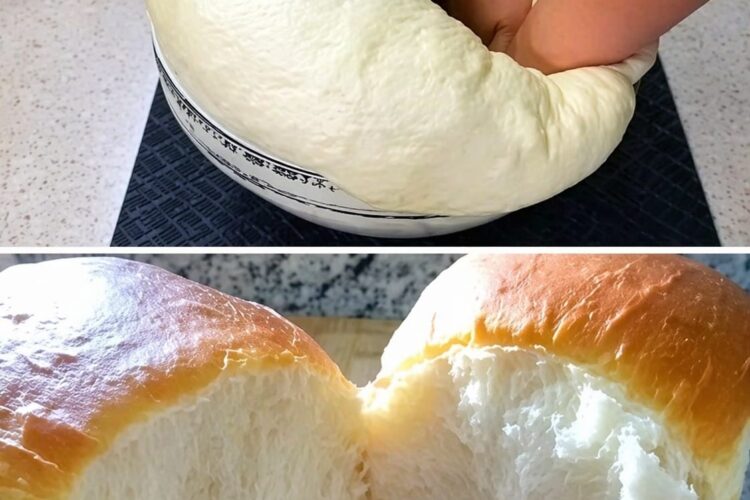
Milk brioche is one of those classic baked goods that instantly makes a kitchen feel warmer and more inviting. It sits somewhere between bread and pastry, with a texture that is so soft and airy it almost feels unreal. When done properly, each bite is light, slightly sweet, and enriched with buttery flavor that melts in your mouth.
Unlike ordinary bread, brioche is enriched with eggs, milk, and butter, which gives it that signature richness and tender crumb. This milk brioche recipe is designed to be simple enough for home bakers while still delivering a bakery-quality result. The goal is a loaf or buns that are fluffy, golden, and soft enough to pull apart like cotton.
Whether you enjoy it fresh out of the oven, lightly toasted with jam, or turned into a decadent dessert base, this brioche will quickly become a favorite in your baking routine.
What Makes Milk Brioche Special?
Milk brioche stands out because of its texture and flavor balance. It is not overly sweet, which makes it extremely versatile. The milk adds softness and moisture, while the butter enriches the dough and gives it that unmistakable bakery aroma.
The key characteristics of a perfect milk brioche are:
- A soft, pillowy crumb
- A light golden crust
- A slightly sweet and buttery flavor
- A delicate, tear-apart texture
When you achieve these qualities, you get a bread that works beautifully for breakfast, snacks, sandwiches, or even dessert-style servings.
Ingredients You Will Need
This recipe uses simple pantry ingredients, but the technique is what brings everything together.
- 3 cups all-purpose flour
- 1/4 cup sugar
- 1 teaspoon salt
- 2 teaspoons instant yeast
- 3/4 cup warm milk
- 2 large eggs
- 1/4 cup soft unsalted butter
- 1 teaspoon vanilla extract (optional, but recommended for aroma)
Each ingredient plays an important role. The flour forms the structure, the eggs add richness, the milk creates softness, and the butter is responsible for that melt-in-the-mouth texture.
Step 1: Activating the Yeast
Start by preparing the yeast mixture. In a small bowl, combine the warm milk with a small portion of the sugar and the instant yeast.
Let it sit for about 5 to 10 minutes. During this time, the yeast will activate and become slightly foamy on the surface. This step ensures your brioche will rise properly and become light and airy.
If your mixture does not foam, the milk may have been too hot or too cold, or the yeast may be inactive. The milk should feel warm to the touch but not hot.
Step 2: Mixing the Dry Ingredients
In a large mixing bowl, combine the flour, remaining sugar, and salt. Mix them well so the salt and sugar are evenly distributed throughout the flour.
This dry mixture forms the foundation of your dough, ensuring consistent flavor and texture in every bite.
Step 3: Forming the Dough
Add the eggs, activated yeast mixture, and vanilla extract into the dry ingredients. Begin mixing until a rough dough starts to form.
At this stage, the dough may look slightly sticky or uneven, which is completely normal. It will come together more smoothly once the butter is added and kneading begins.
Step 4: Incorporating the Butter
Add the softened butter gradually into the dough while mixing. This is one of the most important steps in making brioche.
The butter should be soft enough to blend easily but not melted. As you knead, it will slowly absorb into the dough, creating a smooth and elastic texture.
This step gives brioche its signature richness and softness, so take your time and do not rush it.
Step 5: Kneading the Dough
Knead the dough for about 10 to 12 minutes. You can do this by hand or using a stand mixer fitted with a dough hook.
The dough should transform from slightly sticky and rough into smooth, elastic, and soft. If you stretch it gently, it should not tear easily.
Good kneading develops gluten, which is essential for that airy, fluffy structure. If the dough feels too sticky, you can sprinkle a small amount of flour, but avoid adding too much as it can make the brioche dense.
Step 6: First Rise
Place the dough into a lightly greased bowl. Cover it with a clean cloth or plastic wrap and let it rest in a warm place for 1 to 2 hours.
During this time, the dough should double in size. This fermentation process develops flavor and creates the airy structure that brioche is known for.
Patience is key here. A well-risen dough will always result in a softer and lighter final texture.
Step 7: Shaping the Brioche
Once the dough has risen, gently punch it down to release excess air.
Divide it into equal portions depending on your preferred shape. You can form small balls, buns, or even a traditional loaf shape.
Arrange the pieces in a baking pan with a small gap between them. As they rise again, they will expand and touch each other, creating a soft pull-apart texture.
Step 8: Second Rise
Cover the shaped dough and let it rise again for 30 to 45 minutes.
This second rise is essential. It gives the brioche its final volume and ensures the texture remains light and fluffy after baking.
You will notice the dough becoming visibly puffy and soft during this stage.
Step 9: Baking the Brioche
Preheat your oven to 180°C (350°F).
Before baking, brush the tops of the dough with a little milk or beaten egg. This will give the brioche a beautiful golden shine once baked.
Bake for 20 to 25 minutes, or until the tops are golden brown and the aroma fills your kitchen.
The brioche should feel light and sound slightly hollow when tapped on the bottom.
Step 10: Cooling and Serving
Once baked, remove the brioche from the oven and allow it to cool slightly before serving.
This resting time helps the texture settle and makes slicing or tearing easier.
You can serve it warm for the best experience, when the crumb is still soft and fragrant.
Texture and Flavor Profile
This milk brioche has a delicate, cloud-like texture that is soft and airy. The interior is light and fluffy, while the outer crust is thin and gently golden.
The flavor is mildly sweet with a rich buttery note, making it incredibly versatile. It can be enjoyed as a simple bread or elevated with sweet and savory toppings.
Tips for Perfect Milk Brioche
To achieve the best possible result, keep these tips in mind:
- Always use warm milk, never hot, to protect the yeast
- Knead thoroughly to develop elasticity in the dough
- Allow enough rising time for maximum fluffiness
- Avoid adding too much flour, even if the dough feels sticky
- Use soft butter so it blends smoothly into the dough
- Be patient during fermentation for better flavor and texture
These small details make a big difference in the final result.
Serving Ideas
Milk brioche is incredibly versatile. You can enjoy it in many different ways:
- Spread with butter and honey for a simple breakfast
- Pair with jam or fruit preserves
- Fill with chocolate spread for a sweet treat
- Use it for sandwiches or mini sliders
- Toast slices and serve with coffee or tea
- Turn it into French toast for a rich dessert-style breakfast
Because of its soft texture and mild sweetness, it works beautifully with both sweet and savory flavors.
Storage and Freezing
To keep your brioche fresh:
- Store it in an airtight container at room temperature for up to 2 days
- Reheat slightly before serving to restore softness
- Freeze for longer storage and thaw at room temperature when needed
Proper storage ensures you can enjoy the same soft texture even days later.
Final Thoughts
Milk brioche is more than just bread—it is a comforting homemade treat that brings bakery-quality results into your kitchen. While it requires some patience, especially during the rising stages, the process itself is simple and rewarding.
The end result is a soft, fluffy, buttery bread that feels almost luxurious in texture. Whether you are baking it for family breakfasts, special occasions, or simply to enjoy fresh homemade bread, this milk brioche recipe delivers every time.
Once you try it, it is the kind of recipe you will want to return to again and again.