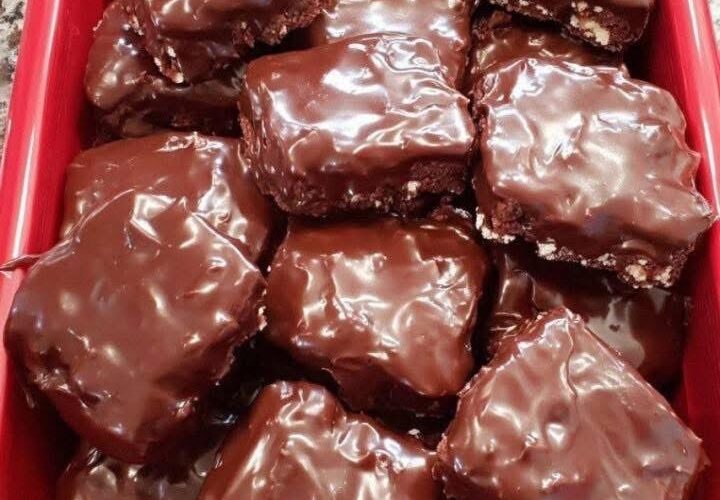
There are everyday desserts… and then there are the kind you make when you want to truly impress, indulge, and savor every bite. Chocolate-Covered Brownie Bars fall firmly into that second category. Rich, dense, and unapologetically chocolatey, these bars take a classic brownie and elevate it into something that feels straight out of a high-end bakery display.
Imagine biting into a thick, fudgy brownie with that perfectly chewy center and slightly crisp edges. Now imagine that same brownie topped with a smooth, glossy layer of melted chocolate that snaps ever so slightly when you bite into it. That contrast of textures—soft and dense beneath, silky and firm on top—is what makes these bars so irresistible.
The beauty of this recipe lies not only in its flavor but also in its simplicity. You don’t need complicated techniques or hard-to-find ingredients. With a handful of pantry staples and a little patience, you can create a dessert that feels luxurious and indulgent without the stress. Whether you’re baking for a celebration, preparing a thoughtful homemade gift, or simply satisfying a deep chocolate craving, these brownie bars deliver every single time.
Why You’ll Love These Chocolate-Covered Brownie Bars
These bars are more than just a dessert—they’re an experience. Each bite is layered with flavor and texture, making them a favorite among chocolate lovers of all ages.
First, there’s the brownie base. It’s dense, moist, and deeply chocolatey, with just the right amount of chew. The combination of granulated sugar and brown sugar creates a balanced sweetness while also contributing to that signature fudgy texture.
Then comes the chocolate coating. Smooth, shiny, and slightly firm once set, it transforms a simple brownie into something much more decadent. It adds a satisfying snap and an extra layer of richness that takes these bars to the next level.
And finally, there’s the versatility. You can cut them into elegant rectangles for a party platter, small squares for bite-sized treats, or large bakery-style bars when you’re feeling extra indulgent.
Ingredients
For the Brownie Layer:
- 1 cup unsalted butter, melted
- 1 ½ cups granulated sugar
- 1 cup brown sugar
- 4 large eggs
- 1 tablespoon vanilla extract
- 1 cup cocoa powder
- 1 cup all-purpose flour
- ½ teaspoon salt
- 1 cup chocolate chips (optional, for extra fudginess)
For the Chocolate Coating:
- 2 cups semisweet or milk chocolate chips
- 2 tablespoons coconut oil or butter
Step-by-Step Instructions
1. Prepare the Brownie Base
Start by preheating your oven to 350°F (175°C). Preparing your pan properly is key to easy removal later, so line a 9×13-inch baking pan with parchment paper, leaving some overhang on the sides. This will allow you to lift the brownies out cleanly once they’ve cooled.
In a large mixing bowl, combine the melted butter, granulated sugar, and brown sugar. Whisk until the mixture becomes smooth and slightly glossy. This step helps dissolve the sugars and creates that signature brownie texture.
Add the eggs one at a time, mixing well after each addition. Stir in the vanilla extract. At this stage, the batter should look thick, rich, and creamy.
2. Add the Dry Ingredients
Sift in the cocoa powder, flour, and salt. Sifting helps prevent lumps and ensures a smooth batter. Gently fold the dry ingredients into the wet mixture until just combined.
Be careful not to overmix here. Overmixing can lead to a tougher texture, and we’re aiming for soft, fudgy brownies.
If you’re using chocolate chips, fold them in at the end. They melt slightly during baking, creating pockets of gooey chocolate throughout the brownies.
3. Bake to Perfection
Pour the batter into your prepared pan and spread it evenly using a spatula. Make sure the surface is level so the brownies bake evenly.
Place the pan in the oven and bake for 25 to 30 minutes. The edges should be set, while the center remains slightly soft. A toothpick inserted into the middle should come out with a few moist crumbs—not completely clean.
Once baked, remove the brownies from the oven and let them cool completely in the pan. This step is crucial before adding the chocolate topping, as warm brownies would melt the coating unevenly.
4. Prepare the Chocolate Coating
While the brownies are cooling, you can prepare the chocolate topping. Combine the chocolate chips and coconut oil (or butter) in a heat-safe bowl.
You can melt the mixture using a double boiler or in the microwave. If using the microwave, heat in 20-second intervals, stirring in between each round. Continue until the chocolate is fully melted and smooth.
The addition of coconut oil or butter gives the chocolate a glossy finish and helps it set with a slight snap.
5. Assemble and Set
Once the brownies are completely cool, pour the melted chocolate over the top. Use a spatula to spread it evenly, making sure it reaches all corners of the pan.
Transfer the pan to the refrigerator and let it chill for 30 to 60 minutes, or until the chocolate layer is fully set. This step transforms the topping into a firm, sliceable layer.
6. Slice and Serve
Using the parchment paper overhang, lift the brownies out of the pan and place them on a cutting board. Use a sharp knife to cut them into your desired shapes.
For clean slices, wipe the knife with a warm, damp cloth between cuts. This helps prevent the chocolate layer from cracking unevenly.
Serve immediately, or store for later—if they last that long.
Tips for the Best Brownie Bars
To achieve the perfect texture, avoid overbaking. Brownies continue to cook slightly as they cool, so it’s better to take them out when the center is still a bit soft.
Use high-quality cocoa powder and chocolate chips for the best flavor. Since chocolate is the star of the recipe, better ingredients will make a noticeable difference.
If you prefer an extra-thick chocolate layer, you can increase the amount of chocolate coating slightly. Just be sure to adjust the setting time accordingly.
Variations to Try
These brownie bars are incredibly versatile, and you can easily customize them to suit your taste.
For a nutty twist, add chopped walnuts, pecans, or hazelnuts to the batter. The crunch pairs beautifully with the fudgy texture.
If you enjoy a hint of saltiness, sprinkle a pinch of flaky sea salt over the chocolate layer before it sets. This enhances the sweetness and adds depth of flavor.
You can also experiment with different types of chocolate for the topping, such as dark chocolate for a richer taste or white chocolate for a striking contrast.
Storage and Make-Ahead Tips
These bars store exceptionally well, making them perfect for preparing in advance. Keep them in an airtight container at room temperature for up to three days, or refrigerate them for up to a week.
They also freeze beautifully. Wrap individual bars in parchment paper and store them in a freezer-safe container for up to two months. When ready to enjoy, simply let them thaw at room temperature.
Serving Suggestions
Chocolate-Covered Brownie Bars are delicious on their own, but they can also be dressed up for special occasions.
Serve them with a scoop of vanilla ice cream for a classic dessert pairing. The contrast between warm brownie and cold ice cream is always a hit.
For a more elegant presentation, drizzle with caramel sauce or dust lightly with powdered sugar before serving.
They also make excellent gifts. Pack them in a decorative box or wrap them individually for a thoughtful homemade treat that anyone would appreciate.
Final Thoughts
Chocolate-Covered Brownie Bars are proof that simple ingredients can create something truly extraordinary. With their rich, fudgy base and smooth chocolate topping, they deliver everything you could want in a dessert—and then some.
They’re easy enough for a casual baking session yet impressive enough for special occasions. Once you make them, you’ll quickly understand why they disappear so fast.
So the next time you’re craving something deeply chocolatey and satisfying, skip the bakery line and make these at home. One bite, and you’ll see exactly why they’ve earned a permanent spot in every chocolate lover’s recipe collection.