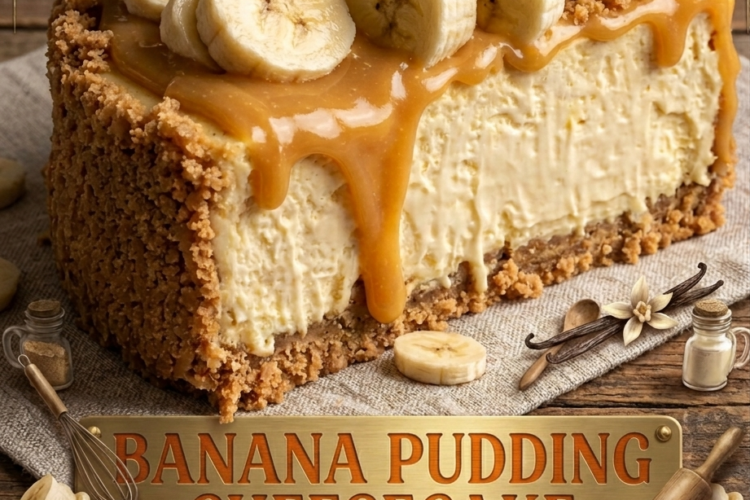
There’s something incredibly comforting about desserts that blend familiar flavors into something new and exciting. That’s exactly what this Banana Pudding Cheesecake delivers—a rich, creamy cheesecake infused with the sweet, nostalgic taste of banana pudding, all sitting on a buttery vanilla wafer crust. If you’ve ever loved classic banana pudding, this dessert takes it to an entirely new level.
Imagine slicing into a smooth, velvety cheesecake layered with real bananas, hints of vanilla, and a crunchy cookie base. Each bite is perfectly balanced: creamy, slightly tangy from the cream cheese, naturally sweet from ripe bananas, and finished with a light, fluffy topping. Whether you’re making it for a family gathering, a special celebration, or simply to treat yourself, this recipe is guaranteed to impress.
In this blog-style recipe guide, you’ll find everything you need to make the perfect Banana Pudding Cheesecake—from ingredients and step-by-step instructions to expert tips and variations.
Why You’ll Love This Banana Pudding Cheesecake
This dessert isn’t just delicious—it’s also incredibly satisfying to make. It combines simple pantry ingredients with classic baking techniques to create something that looks and tastes bakery-quality.
First, the crust is made from crushed vanilla wafers, giving it that signature banana pudding flavor right from the base. Then comes the cheesecake filling, which is luxuriously smooth thanks to cream cheese and heavy cream. The mashed bananas add natural sweetness and a soft, fruity depth that makes every bite irresistible.
Finally, the topping ties everything together with whipped cream, fresh banana slices, and a sprinkle of crushed wafers for crunch. You can even add a layer of prepared banana pudding for an extra indulgent twist.
Ingredients You’ll Need
To make this Banana Pudding Cheesecake, you’ll need a few simple ingredients divided into three parts: the crust, the filling, and the topping.
For the Crust
You’ll need two cups of crushed vanilla wafers and half a cup of melted unsalted butter. This combination creates a firm, buttery base that holds the cheesecake beautifully while adding a subtle crunch.
For the Cheesecake Filling
The filling is the heart of this dessert. You’ll need three packages (8 ounces each) of softened cream cheese, three-quarters of a cup of granulated sugar, and three large eggs. These ingredients form the classic cheesecake base.
To make it extra creamy and flavorful, you’ll also add one cup of heavy cream and one teaspoon of vanilla extract. Finally, two ripe bananas—mashed until smooth—bring that signature banana pudding taste.
For the Topping
For the finishing touch, prepare one cup of whipped cream, one to two bananas sliced into rounds, and a handful of crushed vanilla wafers. If you want to elevate the dessert even more, you can add a layer of prepared banana pudding on top before decorating.
Step-by-Step Instructions
Making this cheesecake may seem like a big project, but breaking it down into simple steps makes it very manageable—even for beginners.
Step 1: Prepare Your Oven and Pan
Start by preheating your oven to 160°C (325°F). Lightly grease a 9-inch springform pan to prevent sticking and ensure easy removal once the cheesecake is set.
Step 2: Make the Crust
In a mixing bowl, combine the crushed vanilla wafers with the melted butter. Stir until all the crumbs are evenly coated and resemble wet sand.
Press this mixture firmly into the bottom of your prepared pan, making sure it’s evenly distributed. You can use the back of a spoon or the bottom of a glass to smooth it out.
Place the crust in the refrigerator while you prepare the filling. Chilling helps it firm up and hold together during baking.
Step 3: Prepare the Cheesecake Filling
In a large mixing bowl, beat the softened cream cheese until smooth and lump-free. This step is important for achieving that silky cheesecake texture.
Add the granulated sugar and continue mixing until the mixture is creamy and well combined.
Next, add the eggs one at a time, mixing thoroughly after each addition. This helps maintain a smooth consistency and prevents overmixing.
Once the eggs are incorporated, pour in the heavy cream and vanilla extract. Mix gently until everything is combined.
Finally, fold in the mashed bananas, ensuring they are evenly distributed throughout the batter.
Step 4: Bake the Cheesecake
Remove the crust from the refrigerator and pour the cheesecake filling over it, spreading it evenly.
Place the pan in the preheated oven and bake for 55 to 65 minutes. The edges should be set, while the center remains slightly jiggly. This is key to a creamy texture.
Avoid opening the oven door too often, as sudden temperature changes can cause cracks.
Step 5: Cool the Cheesecake Slowly
Once baking is complete, turn off the oven and leave the cheesecake inside with the door slightly open for about one hour. This gradual cooling process helps prevent cracks from forming on the surface.
After that, remove the cheesecake from the oven and let it cool to room temperature.
Step 6: Chill Until Set
Transfer the cheesecake to the refrigerator and let it chill for at least four hours, though overnight is best. This allows the flavors to develop fully and the texture to firm up perfectly.
Step 7: Add the Toppings
Before serving, spread whipped cream over the top of the cheesecake. Arrange banana slices in a decorative pattern and sprinkle crushed vanilla wafers for added texture.
If you’re using banana pudding, spread a thin layer on top before adding the whipped cream for an extra creamy finish.
Tips for the Perfect Cheesecake
To ensure your Banana Pudding Cheesecake turns out perfectly every time, keep these helpful tips in mind.
Always use room temperature ingredients, especially the cream cheese and eggs. This helps create a smoother batter and prevents lumps.
Avoid overmixing once the eggs are added. Overmixing can incorporate too much air, which may cause the cheesecake to crack during baking.
If you want an ultra-smooth texture, consider baking the cheesecake in a water bath. This adds moisture to the oven and helps it cook evenly.
When slicing, use a sharp knife dipped in warm water and wiped clean between each cut. This gives you neat, professional-looking slices.
Variations to Try
One of the best things about this recipe is how easy it is to customize.
For a richer flavor, try adding a drizzle of caramel sauce on top. Caramel pairs beautifully with bananas and adds a deeper sweetness.
If you love chocolate, sprinkle mini chocolate chips into the filling or drizzle melted chocolate over the finished cheesecake.
You can also experiment with different cookies for the crust, such as graham crackers or digestive biscuits, for a slightly different flavor profile.
How to Store Banana Pudding Cheesecake
This cheesecake stores well, making it a great make-ahead dessert.
Keep it covered in the refrigerator for up to four days. If you plan to store it longer, you can freeze it without the toppings for up to two months. When ready to serve, thaw it in the refrigerator overnight and add fresh toppings.
Final Thoughts
Banana Pudding Cheesecake is the perfect fusion of two beloved desserts. It’s creamy, flavorful, and beautifully layered with textures that make every bite exciting.
Whether you’re a seasoned baker or just starting out, this recipe is approachable and rewarding. The combination of bananas, vanilla wafers, and rich cheesecake filling creates a dessert that feels both nostalgic and indulgent.
Once you try it, it might just become your go-to dessert for special occasions—or anytime you’re craving something truly delicious.